RESTful API Design-first development with Apicurio Studio
Last modified: 27 Oct, 2021
Introduction
There is no specific need to start the introduction with terms like swagger, openapi, API Specs. These are defacto terms that we come across and use them on day-to-day basis as part of API Development activities.
But, we need to understand three key approaches revolving around these terms which will help us to pick the right fit before we kickstart an API Project and how would Apicurio Studio fit in with Design-first approach.
Code-first
A code-first approach is typically the first choice by every backend developer. Once we receive the business requirements, especially the Java folks generate the project code using springboot initializer, Quarkus Generator, Micronaut Launcher, maven generate or gradle init and jump straight ahead creating the controller classes. This all ends by documenting the controller classes/methods with swagger annotations and configuring application to generate spec during build or runtime.
A code-first approach doesn’t mean that we won’t think through on API design. Instead, we end up configuring multiple annotations scattered across the project.
API-first
An API-first approach means that we start understanding the business requirements and have the specification documented in OpenAPI or RAML followed by code implementation.
This would ensure that the api specification would be the source of truth to both frontend and backend developer and would not cause any last minute surprises during integration testing.
API Design-first
API design-first is inline to API-first approach, but a step ahead on focusing more on designing the specification in an collaborative and iterative approach. By defining and adopting few standard design principals, every team or tool would adhere to them and understands the same API design.
With design-first approach, we spend lot of time on design, collaboration and reviewing the specification which would satisfy all the involved parties. This process can add couple of days or weeks to the delivery, but it’s worthwhile to invest on this which would greatly minimize additional thought process or reworks when implementing the API.
Starting with API Specification
API-first or API design-first share the same importance on documenting the API specs prior to start building the API. It is the source of truth to all the involved parties revolving around the API. The additional aspect of API design-first is to adopt and adhere to defined design principals set between the teams or within organization when we build any API.
With either of these approaches, we start our build journey by drafting the API Specification (a.k.a spec) using commonly used OpenAPI Specification.
The OpenAPI Specification is a standard format which define structure and syntax to design REST APIs. OpenAPI documents are both machine and human-readable, which enables anyone to easily determine how each API works. Engineers can use it to generate server/client stubs in different technologies, implement their services, and also perform contract testing.
Likewise, there are many online/offline editors available which can be used to document or view OpenAPI spec. For the purpose of this article, we shall use Apicurio Studio.
Why use Apicurio Studio
Apicurio Studio is a web based API Design suite which supports Design-first REST API development. It provides way for users to collaboratively and visually design APIs prior to starting the build activities.
Apicurio Studio is part of Apicurio suite of products like Apicurio Registry, Apicurio Data Models and Apicurito. Apicurio is completely open source backed by Red Hat.
This article doesn’t provide deep dive information on how to use Apircurio, rather we can just focus on how to get it up and running for local development activities.
Prerequisites
Having Docker installed on your machine is helpful to get quickly started with Apicurio Studio.
Install Docker Desktop to get started with Docker on Windows.
Post installation, run the below commands in command prompt to verify if docker & docker-compose are installed successfully or validate if they are working as expected if docker is installed previously.
λ docker -v

Docker version 20.10.8, build 3967b7dλ docker-compose -v
Docker Compose version v2.0.0Apicurio Studio Docker Images
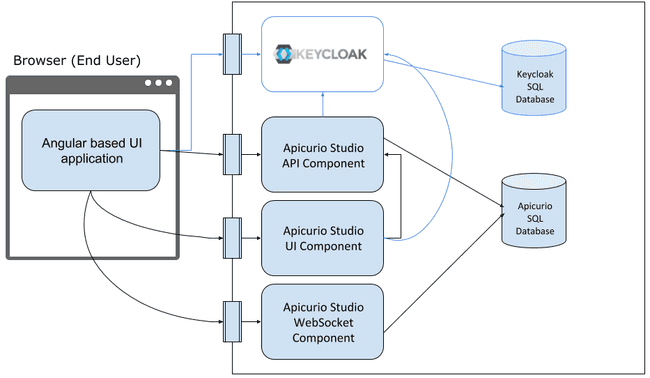
Apicurio Studio is collectively made of below individual components.
- apicurio-studio-api - The RESTful API backend which is used by the user interface.
- apicurio-studio-ui - The user interface component serving HTML,JS and CSS for the Studio.
- apicurio-studio-ws - Websocket based API used by the Apicurio Studio Editor to provide real-time collaboration with other users.
These require the below components for bootstrapping Apicurio Studio successfully.
- SQL Database - Apicurio Studio requires database to persist data managed from the studio. We can configure
PostgresqlorMysqlfor the same.
- Identity and Access management service Keycloak is integrated with
Apicurio StudioandMicrocks.
Optionally, we can integrate with Microcks which allows us to transform the API spec to create live API mocks. This is helpful for consumers to start integrating with the mocks when API is still under development stage and not yet fully implemented. Microcks is a topic for another article.
Below is a quick snapshot on how these components depend on each other. Considering multiple dependent services, we need to use docker-compose to orchestrate provisioning Apicurio Studio to make it functionally up & running.
Docker-compose based installation
This post is based on Apicurio Studio's official github repository which has multiple files. Repo that we use in this post is a slimmed minimalistic version of the same.
Clone the Repo and execute the below sequence of commands to orchestrate the services deployment.
λ git clone https://github.com/2much2learn/article-rest-api-design-first-development-with-apicurio.git

λ cd article-rest-api-design-first-development-with-apicurio
Replace <IP_ADDRESS> in below files with ip address of your host where the services are orchestrated
- .env.template -> save as
.env - config\keycloak
- apicurio-realm.json.template -> save as
apicurio-realm.json - microcks-realm.json.template -> save as
microcks-realm.json
- apicurio-realm.json.template -> save as
Perform below series of commands to build, verify and up the services
λ docker-compose buildλ docker-compose config --services
apicurio-studio-db
apicurio-studio-ws
apicurio-studio-api
apicurio-studio-ui
jboss-keycloak-postgresql
jboss-keycloak
postman
mongo
microcksλ docker-compose up -dλ docker-compose ps
-- Display aggregated logs across the containers with one command
λ docker-compose logs -f
-- or display logs for individual containers as needed by using the service names as listed above
λ docker-compose logs -f jboss-keycloakλ docker-compose logs -f apicurio-studio-apiλ docker-compose logs -f apicurio-studio-uiWait for couple of minutes for all the containers to start successfully and get ready to accept requests.
Accessing Apicurio Studio
To design OpenAPI spec, the defacto tool is Swagger Editor which lets us edit OpenAPI specifications in YAML inside our browser and preview documentations in real time. This requires no setup or registration. Once done drafting the spec, we need to save the YAML to local and later import to editor to modify it again.
Unlike Swagger Editor, Apicurio follows a very different approach. It is backed by Keycloack which is an Identify and Access Management service, which lets us create user accounts or the user can self register to start using Apicurio and has its own datasource to persist the users work.
Apicurio Studio is configured to start on 9093 port as defined in docker-compose.yml. Service will be registered with the host ip that is configured in .env file.
Access Apicurio Studio user interface by navigating to http://<IP_ADDRESS>:9093. This should pop up the login screen managed by Keycloak.
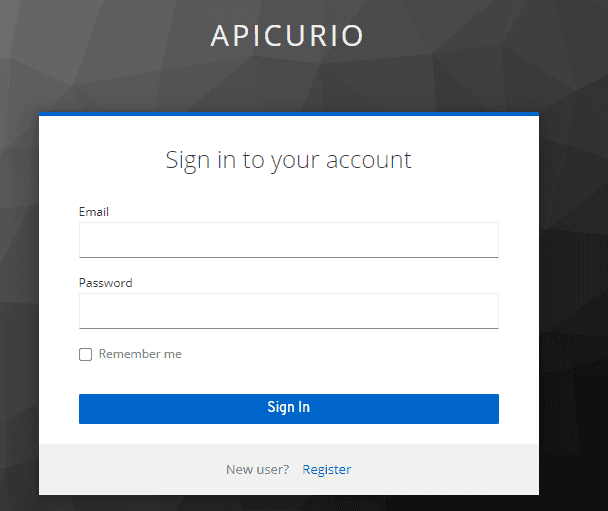
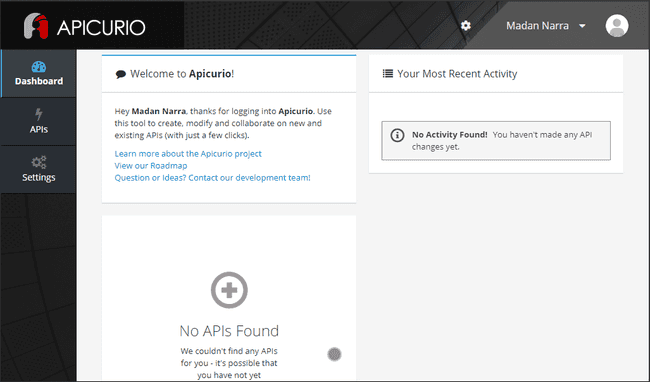
To get started, click on Register to create an user account which would eventually navigate to studio’s dashboard page.
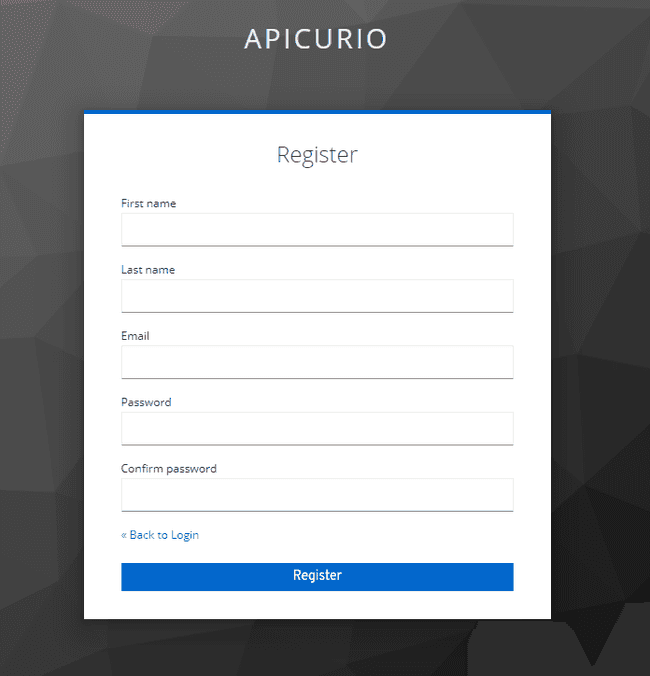
Design OpenAPI spec using Apicurio Studio
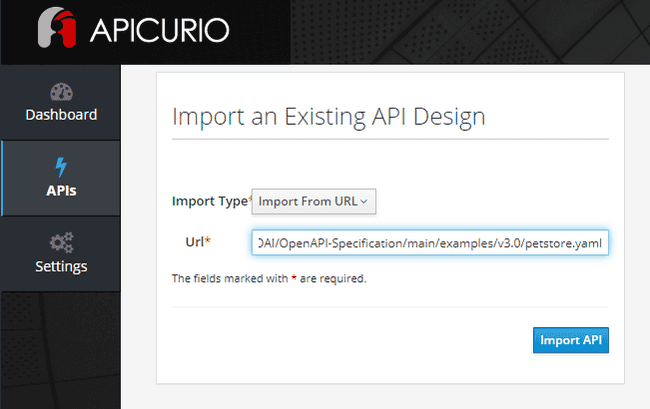
Click on APIs on the left navigation and choose to Create New API or Import API. For the purpose of this article and to get our hands dirty quickly, choose Import API and select Import from URL to import the famous PetStore OpenAPI 3 specification .
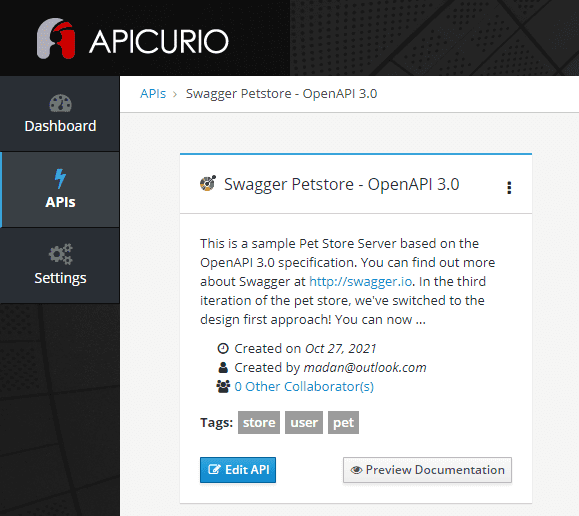
Provide Petstore OpenAPI spec url and click on import. This should create and list the API as below.
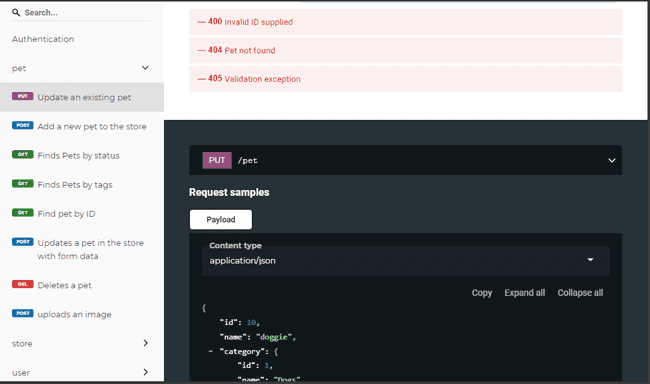
Click on Preview Documentation to view the specification displayed in well formatted output powered by Redoc.
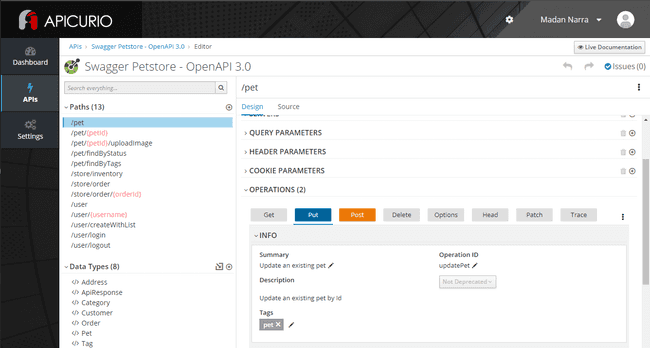
Now the fun and exciting part, Click on Edit API to start editing the swagger using the graphical user interface. With multiple options at hand, Choose to Add a new Path, Parameters, Data type or modify existing elements.
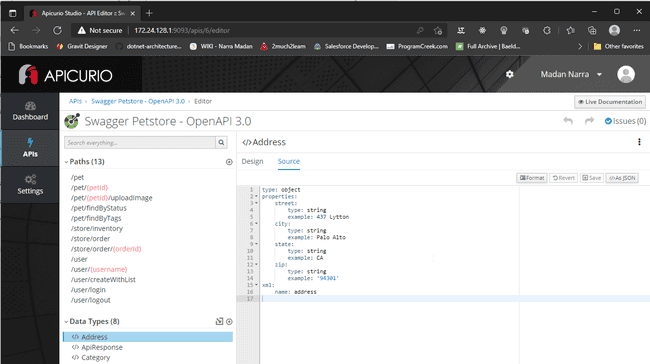
Compared to Swagger Editor, It’s breeze to update the spec using inbuilt source editor. Click on the API Title and navigate to Source to view and edit the spec. To update a specific Path or Data Type, click on the element and view or edit the source.
Similar to Swagger Editor, we can preview the changes in live by clicking on Live Documentation. Any changes made to the swagger will be immediately reflected in the documentation view.
Collaborating with Apicurio Studio
One of the hidden super power in Apicurio Studio is the collaboration feature. API Design with mutual discussion and constant review with the team is the fundamental principal for API Design-first approach which is well versed with collaboration feature.
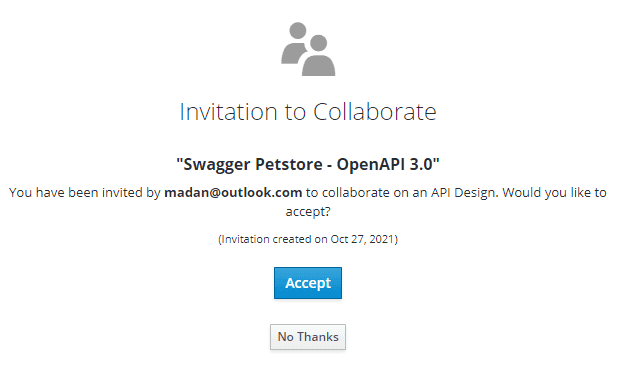
User who wish to collaborate with other users can share the collaboration link of their API. Once the other user accepts the invitation, they can start designing the API spec collaboratively.
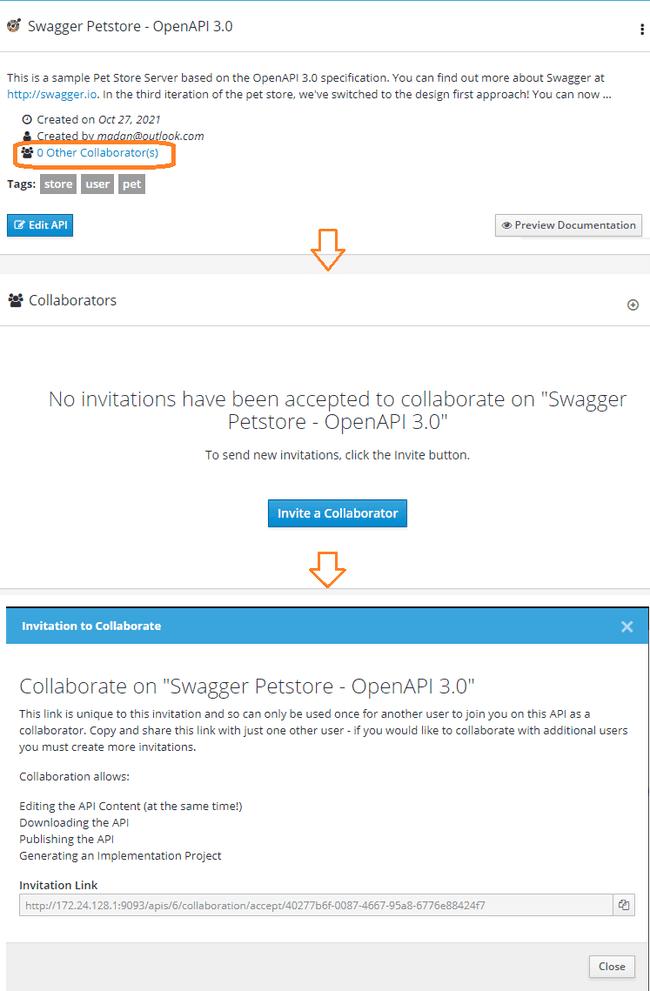
Other users who which to participate in the design process can navigate to the link to accept the invitation. Unregistered user should register first to accept the invite.
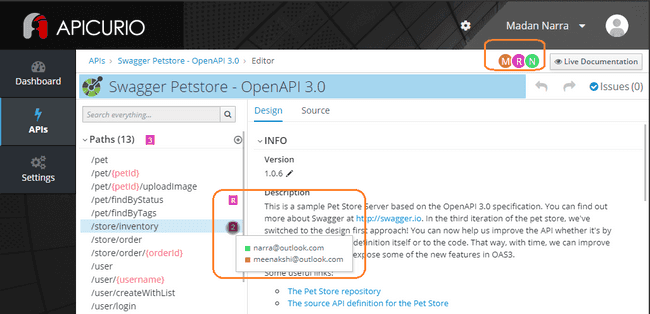
When one or ore collaborates are accessing the same API in edit mode, their avatars would be displayed on the title bar and also listed next to the element they selected or updating.
Salient features of Apicurio Studio
This is the introduction post on Apicurio Studio which covers basics on provisioning and getting started with it to design our first or existing API. There are many other salient features part of the studio as below:
Importing and managing AsyncAPIs, which is the standard specification created to implement asynchronous APIs part of event-driven architecture.
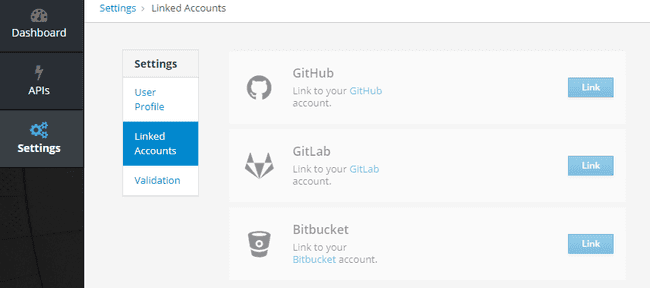
API Designs can be published to git repositories hosted on
Github,GitlaborBitbucketby linking them.
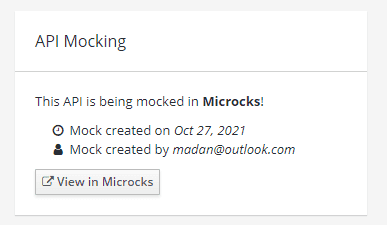
- Exporting designs to Microcks to enable
API MockingandContract Testingcapabilities.
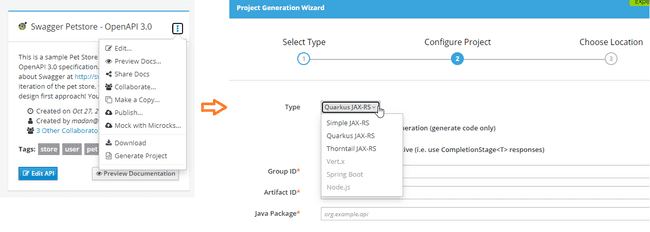
- Generate Project code from the design with option to choose from wide range of frameworks.
Import
Data Types&Responsesfrom other designs. This should save ample time if our APIs use some common responses or data types which we can import them instead of copy pasting to the source directly.With
Apicurio Studio APIas an independent backend component, we can integrate it with any other application or automate any specific workflow part of CI/CD process.
Access Keycloack and Microcks services
Along with Apicurio Studio, we have other services started which we can access independently using their specific urls.
Keycloak
Navigate to http://<IP_ADDRESS>:9090/auth/admin to access Keycloak. Login with credentials admin/admin. Upon login, we should be seeing three realms - master, apicurio & microcks.
Instead of users to register to access Apicurio Studio, we can create couple of users in apicurio realm.
Microcks
Navigate to http://<IP_ADDRESS>:9900/ to access Microcks. This is also integrated with Keycloak and would showup login page managed by keycloak. Login with credentials admin/admin to login as the administrator or we can register a user account to explore the features it provides.
At the moment we don’t have user accounts shared across both the services, rather we need to register to these services individually and use them.
More details on using Microcks will be available in subsequent article.
Stop & Start the services
As multiple services are provisioned to try Apicurio Studio, these might utilize most of your CPU and memory. If you want to temporarily bring these services down, we can stop all of them with ons command and start them back when needed.
Run the below command from the directory where the services were started to stop and start the services
λ docker-compose stop

$ docker-compose start
Changing Host IP Address
If there is a need to reconfigure the services with a new Host ip address, then delete the files that are created .env, config\keycloak\apicurio-realm.json and config\keycloak\microcks-realm.json and recreate them from .template files as described in previous steps.
Run the below command from the directory where the services were started to recreate the services to apply the recent configuration changes.
λ docker-compose up -d --force-recreateCleanup
Inorder to try Apicurio Studio as part of this article, we provisioned multiple services through docker-compose. These services should be stooped or brought down if no longer in use. As these services creates volumes and networks, they should also be deleted to free up some space.
Execute the below commands from the directory where the services were started. These should bring down the services and perform the necessary clean up.
λ docker-compose down -v

λ docker system prune --volumes

λ docker network prune
Conclusion
To conclude, using Apicurio Studio is a great approach to visually implement API specification following Design-first approach. Non Technical folks can document the specs with breeze without needed to bother about the complex implementation using YAML or JSON.
With the power of collaboration, a rock-solid API can be designed with other team members without needing to share multiple versions of the spec file over emails and messengers.
Using Apicurio Studio would feel like a cumbersome when managing one or two APIs, but it would definitely feel worthwhile when managing many APIs with other team members.
Integration with Microcks for API Mocking and Contract Testing is another added benefit to try and test the API spec before it is shared to API engineers or consumers to kickstart their development activities. More details on using Microks with Apicurio Studio will be covered in a subsequent post.
I Would recommend all API Engineers to give Apicurio Studio a try and use it for their side-hustle projects or empower their team to adopt it and follow Design-first approach in their organization.
