A Step by Step guide to create RESTful + Event-driven Microservice using Quarkus + JPA with Postgres database
Last modified: 24 Apr, 2020
Introduction
This article focuses on implementing a microservice application which includes RESTful APIs and event-driven interactions.
Application is built using Quarkus, which is a container-first framework optimized for fast boot times and low memory consumption. Along with other supporting ecosystem tools, this article help us to understand the true nature of implementing a microservice.
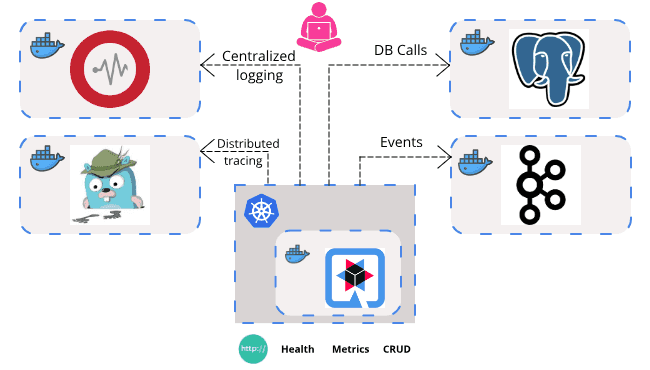
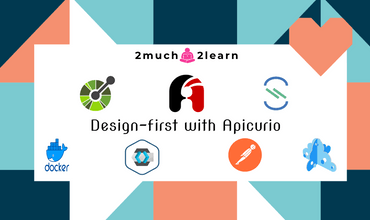
Below is the representation of what we are planning to achieve part of this article.
This is a lengthy article which is one stop guide for implementing a microservice to handle both Restful APIs and events using Quarkus. Follow by the steps or jump to specific section as needed.
We will be implementing Catalogue Management Service, which includes restful APIs to Create, Read, Update and Delete Catalogue Items by their SKU (Stock Keeping Unit) and also includes Events handled and triggered to Kafka Topics. We will be using Postgres Database provisioned in a docker container with schema being recreated each time the application boots-up.
Article also includes detailed steps on
- Configuring
Maven&Gradlebuilds. - Utilising multiple
MicroProfilespecifications for Production-readiness. - Handling/Triggering
Kafka Topicevents. - Building Native Executables using
GraalVM. - Integration tests with
JUnit5&REST-assured. - Using
TestContainersto support Integration tests by creating throwaway instances of Docker Containers. - Creating
Dockerimages and deploying it toKuberneteswithSkaffold. - Centralized Logging with
Graylog. - Distributed Tracing with
Jaeger. - Configuring
JaCoCofor collecting Code Coverage metrics. - Test APIs using
Postman.
Catalogue Management System
We will be implementing the below CRUD Restful APIs to manage items for a Catalogue Management System.
| HTTP Method | API Name | Path | Response Status Code |
|---|---|---|---|
| POST | Create Catalogue Item | / | 201 (Created) |
| GET | Get Catalogue Items | / | 200 (Ok) |
| GET | Get Catalogue Item | /{sku} | 200 (Ok) |
| PUT | Update Catalogue Item | /{sku} | 200 (Ok) |
| DELETE | Delete Catalogue Item | /{sku} | 204 (No Content) |
And the below Kafka Topics
| Topic | Type |
|---|---|
| price-updated | Outgoing |
| product-purchased | Incoming |
Technology stack used in this Article to build and test drive the microservice...
- GraalVM JDK 11
- Quarkus v1.3.2
- Eclipse MicroProfile
- SmallRye
- Hibernate v5.4.14
- JPA v2
- Docker
- MicroK8s
- Skaffold
- Kafka
- Graylog
- Jaeger Tracing
- Maven v3.6.3
- Gradle v6.1.1
- IntelliJ Idea v2019.3.2
Why Quarkus?
Quarkus is an Open Source stack to write Java applications, specifically backend applications. It is described as A Kubernetes Native Java stack tailored for OpenJDK HotSpot & GraalVM, crafted from the best of breed Java libraries and standards and greatly boasted as “Supersonic Subatomic Java”.
Quarkus has been designed around a container first philosophy meaning that it is optimised for low memory usage and fast start-up.
It does this by enabling the following:
- First class support for Graal/SubstrateVM
- Build time metadata processing
- Reduction in reflection usage
- Native image pre boot
It also makes developers lives a lot easier by allowing:
- Unified configuration
- Zero config, live reload in the blink of an eye
- Streamlined code for the 80% common usages, flexible for the 20%
- No hassle native executable generation
Wired on a standard backbone, it brings the best breed of libraries and standards. These standards include CDI, JAX-RS, ORM, JPA and many more and instead of a whole application server the applications are run in an optimized runtime either via a Java runtime, native executable or a native image.
Eclipse MicroProfile
Eclipse MicroProfile is an initiative that aims to optimize Enterprise Java for the Microservices architecture. It’s based on a subset of Jakarta EE WebProfile APIs, so we can build MicroProfile applications like we build Jakarta EE ones.
The goal of MicroProfile is to define standard APIs for building microservices and deliver portable applications across multiple MicroProfile runtimes.
SmallRyeis vendor-neutral implementation of MicroProfile for Helping Java Developers deliver for tomorrow.
Quarkus has extensions for each of the SmallRye implementations, enabling a user to create a Quarkus application using SmallRye, and thus Eclipse MicroProfile.
Below are few of the MicroProfile specifications that are being used in this application through the SmallRye Health extension:
TL;DR
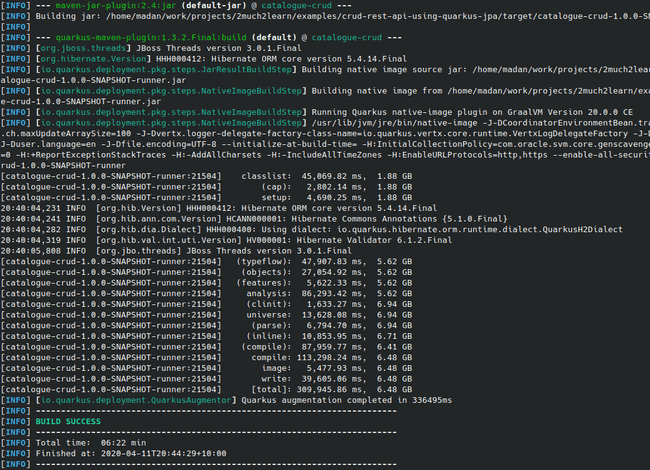
For those who want to see the end result of this application, watch this video with playback speed set to 2 and fast-forward if needed. You might observe nothing happening which is because of provisioning test containers during integration tests and long build time for native images.
As observed, below are series of steps performed to test drive the microservice application. It gives high level understanding on what we are planning to go through in this article.
Do ensure to perform Prerequisites before trying out these commands !!!
# Build native image. This will execute tests, capture code coverage and create native executable
$ mvn clean package -Pnative

# Start Postgres docker container.
$ docker start pgdocker

# Bring Kafka cluster up
$ docker-compose -f docker-compose/kafka-docker-compose.yaml up -d

# Start Graylog centralized logging
$ docker-compose -f docker-compose/graylog-docker-compose.yaml up -d

# Start Jaeger Tracing
$ docker-compose -f docker-compose/jaeger-docker-compose.yaml up -d

# Run native executable
$ ./target/catalogue-crud-1.0.0-SNAPSHOT-runner

# Launch postman, import collection and launch collection runner

# Login to kafka cluster by its container id
$ docker exec -it <CONTAINER_ID> /bin/bash

# Postman > Create catalogue item with inventory 10

# Publish product-purchased event
$ ./bin/kafka-console-producer.sh --broker-list localhost:9092 --topic product-purchased

# Postman > Get Catalogue Item > verify inventory changed to 9

# Postman > Update price of catalogue item

# Consume price-updated event
$ ./bin/kafka-console-consumer.sh --bootstrap-server localhost:9092 --topic price-updated --from-beginning

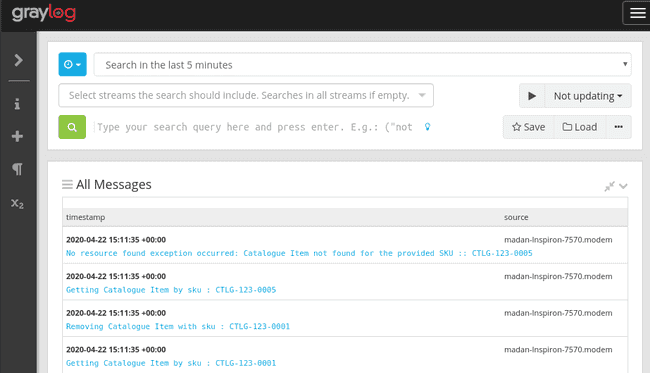
# Access Graylog and verify captured logs
> http://127.0.0.1:9000 admin/admin

# Access Jaeger and verify captured traces
> http://127.0.0.1:16686

# Shutdown native executable

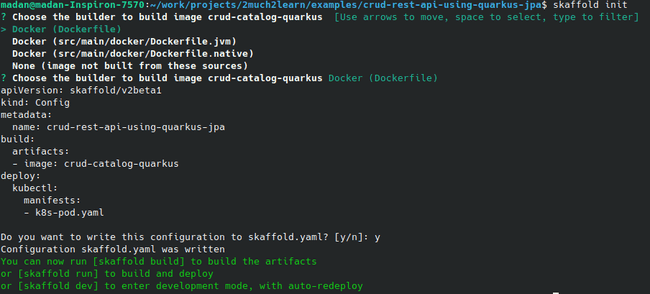
# Run skaffold to build docker image and deploy it to kubernetes
$ skaffold run

# Watch how pod gets created and status changed to running
$ watch k get pods

# launch Postman collection runner

# Bring down kubernetes pod
$ skaffold delete

# Bring down kafka cluster
$ docker-compose -f docker-compose/kafka-docker-compose.yaml down

# Bring down graylog
$ docker-compose -f docker-compose/graylog-docker-compose.yaml down

# Bring down jaeger
$ docker-compose -f docker-compose/jaeger-docker-compose.yaml down

# Bring down postgres
$ docker stop pgdocker
Prerequisites
Microservice referred in this article is built and tested on Ubuntu OS. If you are on windows and would like to make your hands dirty with Unix, then I would recommend going through Configure Java development environment on Ubuntu 19.10 article which has detailed steps on setting up development environment on Ubuntu.
At the least, you should have below softwares and tools installed to try out the application:
Docker&Docker Compose- Flavour of Lightweight Kubernetes -
microk8s(or)minikube(or)k3s. - Google
Skaffoldfor building, pushing and deploying your application.
$ docker -v
Docker version 19.03.6, build 369ce74a3c

$ kubectl version
Client Version: version.Info{Major:"1", Minor:"18", GitVersion:"v1.18.1", GitCommit:"7879fc12a63337efff607952a323df90cdc7a335", GitTreeState:"clean", BuildDate:"2020-04-08T17:38:50Z", GoVersion:"go1.13.9", Compiler:"gc", Platform:"linux/amd64"}
Server Version: version.Info{Major:"1", Minor:"18", GitVersion:"v1.18.1", GitCommit:"7879fc12a63337efff607952a323df90cdc7a335", GitTreeState:"clean", BuildDate:"2020-04-08T17:30:47Z", GoVersion:"go1.13.9", Compiler:"gc", Platform:"linux/amd64"}

$ skaffold version
v1.7.0
Start PostgreSQL
We shall provision PostgreSQL docker container and point to it in application datasource configuration.
Before provisioning PostgreSQL container, we need to create a data container with a mounted volume which will be used to store the database that we create. Execute the below command to create a data container.
$ docker create -v /article_postgres_docker --name PostgresData alpineExecuting the below command with docker run will pull the image and start the container with name pgdocker. PostgreSQL stores its data in /var/lib/postgresql/data, so we are mounting the created data container volume with --volume-from flag. Also, as seen we are exposing port 5432 (the PostgreSQL default) and running the container in detached (-d) mode (background). Password to be used for the database is configured with the environment variable POSTGRES_PASSWORD.
$ docker run -p 5432:5432 --name pgdocker -e POSTGRES_PASSWORD=password -d --volumes-from PostgresData postgresRun the below command with docker exec to create cataloguedb database which we will configure in our microservice.
$ docker exec pgdocker psql -U postgres -c "create database cataloguedb"You may refer to my other article on Setting up PostgreSQL with Docker for additional details.
Start Kafka Cluster
Use below command to start Kafka Cluster using Docker Compose with instructions provided in kafka-docker-compose.yaml file provided with the application codebase.
$ docker-compose -f docker-compose/kafka-docker-compose.yaml up -dVerify if Kafka cluster is started and working as expected.
$ docker exec -it <CONTAINER_ID> /bin/bashTest drive if Kafka Cluster is started as expected by creating topic and able to publish & consume messages from the topic.
$ ./bin/kafka-topics.sh --create --bootstrap-server localhost:9092 --replication-factor 1 --partitions 1 --topic test$ ./bin/kafka-topics.sh --list --bootstrap-server localhost:9092$ ./bin/kafka-console-producer.sh --broker-list localhost:9092 --topic test
> Test Message 1
> Test Message 2$ ./bin/kafka-console-consumer.sh --bootstrap-server localhost:9092 --topic test --from-beginningIf messages sent to topic is listed from consumer, then Kafka cluster is started successfully with docker compose.
Centralized Logging with Greylog
Graylog is a powerful platform that allows for easy log management of both structured and unstructured data along with debugging applications. It is based on Elasticsearch, MongoDB and Scala. Graylog has a main server, which receives data from its clients installed on different servers, and a web interface, which visualizes the data and allows working with logs aggregated by the main server.
Use below command to start Graylog along with MangoDB and Elasticsearch using Docker Compose with instructions provided in docker-compose/graylog-docker-compose.yaml file provided with the application codebase.
$ docker-compose -f docker-compose/graylog-docker-compose.yaml up -dThis will start all three Docker containers. Open the URL http://127.0.0.1:9000 in a web browser and log in with username admin and password admin to check if graylog is booted up as expected.
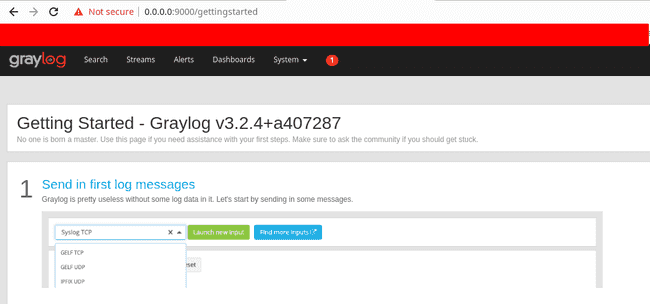
Follow below steps to start capturing logs published to Graylog
- Navigate to
System > Inputs. - Select
GELF UDPfrom Input dropdown and clickLaunch New Input. - Check
Globalcheckbox, give anameand clickSave.
Distributed Tracing with Jaeger
Jaeger is open source, end-to-end distributed tracing. It is used for monitoring and troubleshooting microservices-based distributed systems, including:
- Distributed context propagation
- Distributed transaction monitoring
- Root cause analysis
- Service dependency analysis
- Performance / latency optimization
Use below command to start Jaeger using Docker Compose with instructions provided in docker-compose/jaeger-docker-compose.yaml file provided with the application codebase. all-in-one docker image is used in compose file and hence everything is bundled and booted into single container.
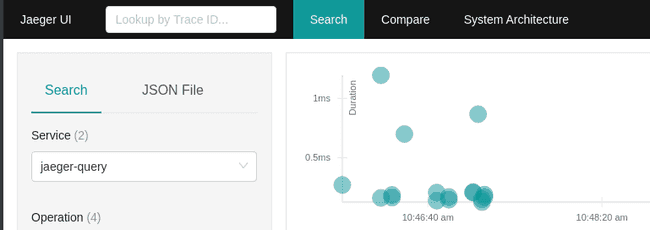
$ docker-compose -f docker-compose/jaeger-docker-compose.yaml up -dOpen the URL http://127.0.0.1:16686 in a web browser to check if Jaeger is booted up as expected.
Bootstrapping Project with Quarkus Code
Jump to code.quarkus.io to configure our application with Maven/Gradle along with all extensions that we are planning to include.
Update Group, Artifact, Package Name and Build Tool of your choice. Select the below extensions and click on Generate your application button. This should download the zip file. Extract to specific location of your choice.
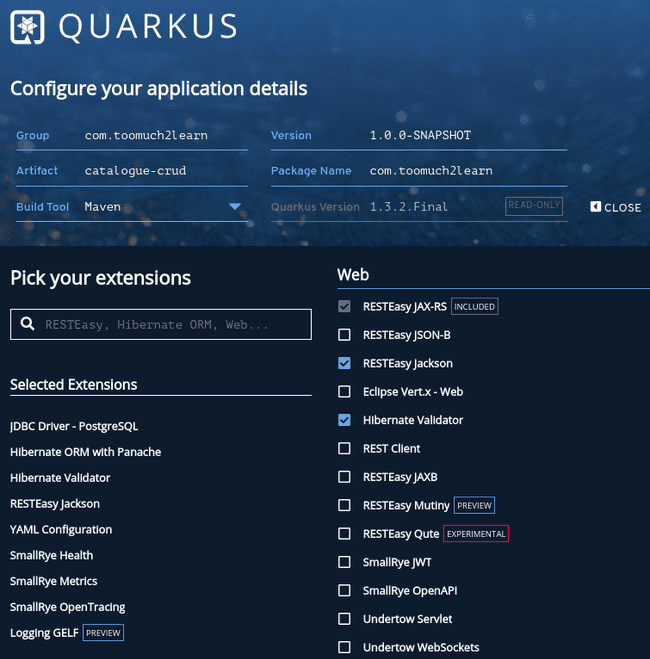
Configure IntelliJ IDEA
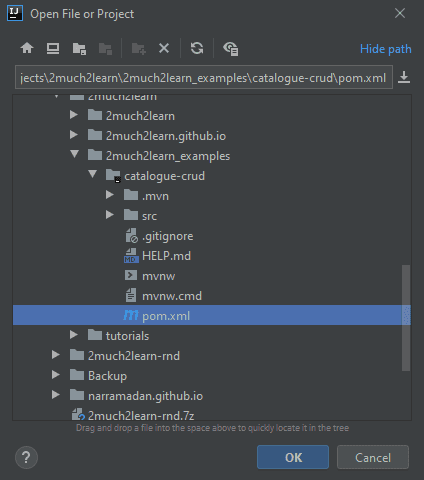
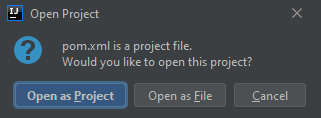
Extract the downloaded maven/gradle project achieve into specific location. Import the project into IntelliJ Idea by selecting pom.xml which will start downloading the dependencies.
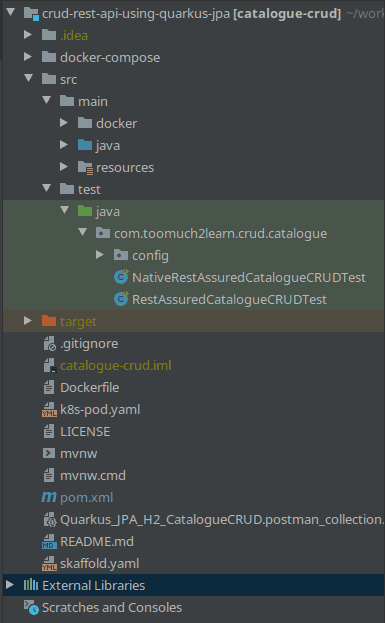
This should show the below project structure
Post importing based on the build system being used, dependencies will be downloaded and ready for execution.
We will be heavily relying on Project Lombok, which is a Java Library which makes our life happier and more productive by helping us to never write another getter or equals method again, constructors which are so repetitive. The way Lombok works is by plugging into our build process and autogenerating Java bytecode into our .class files as per a number of project annotations we introduce in our code.
Below is sample Lombok code for a POJO class:
@Data
@AllArgsConstructor
@RequiredArgsConstructor(staticName = "of")
public class CatalogueItem {

    private Long id;
    private String sku;
    private String name;
}@Datais a convenient shortcut annotation that bundles the features of@ToString,@EqualsAndHashCode,@Getter/@Setterand@RequiredArgsConstructorall together.@AllArgsConstructorgenerates a constructor with 1 parameter for each field in your class. Fields marked with @NonNull result in null checks on those parameters.@RequiredArgsConstructorgenerates a constructor with 1 parameter for each field that requires special handling.
IDE Plugins
Install Lombok plugin in IntelliJ Idea or Eclipse to start using the awesome features it provides.
Replace application.properties with application.yml
YAML is a superset of JSON, and as such is a very convenient format for specifying hierarchical configuration data.
Quarkus supports YAML configuration since SmallRye Config provides support for it when we add quarkus-config-yaml extension.
Replace application.properties with application.yml under src/main/resources.
Below is already part of pom.xml when selecting the below extension and generating code:
<dependency>
    <groupId>io.quarkus</groupId>
    <artifactId>quarkus-config-yaml</artifactId>
</dependency>quarkus:
# load Custom Banner - Generated at http://patorjk.com/software/taag/#p=display&f=Slant&t=Catalogue%20CRUD
banner:
path: banner.txtConfiguring multiple profiles
Quarkus supports the notion of configuration profiles. These allow us to have multiple configuration in the same file and select between them via a profile name.
By default Quarkus has three profiles, although it is possible to use as many as you like. The default profiles are:
- dev - Activated when in development mode (i.e. quarkus:dev)
- test - Activated when running tests
- prod - The default profile when not running in development or test mode
Below is sample configuration for test profile:
### Test Configuration ####
"%test":
  quarkus:
    # Datasource configuration
    datasource:
      db-kind: postgresql
      jdbc:
        driver: org.testcontainers.jdbc.ContainerDatabaseDriver
        url: jdbc:tc:postgresql:latest:///cataloguedb
Observe %test is enclosed with double quotes. This is how we can configure custom profiles and choose them loaded when running the application as below:
$ mvn package -Dquarkus.profile=prod-aws`

The command will run with the prod-aws profile. This can be overridden using the quarkus.profile system property.
Adding additional dependencies to maven
Apart from the dependencies that are included in pom.xml, include the below ones which will be used for our implementation.
Few of these are already part of the extensions that we selected when generating the code.
Bean Validation API & Hibernate Validator
Validating input passed in the request is very basic need in any implementation. There is a de-facto standard for this kind of validation handling defined in JSR 380.
JSR 380 is a specification of the Java API for bean validation which ensures that the properties of a bean meet specific criteria, using annotations such as @NotNull, @Min, and @Max.
Bean Validation 2.0 is leveraging the new language features and API additions of Java 8 for the purposes of validation by supporting annotations for new types like Optional and LocalDate.
Hibernate Validator is the reference implementation of the validation API. This should be included along side of validation-api dependency which contains the standard validation APIs.
Below is the dependency that need to be included:
<dependency>
  <groupId>io.quarkus</groupId>
  <artifactId>quarkus-hibernate-validator</artifactId>
</dependency>
Quarkus Health
Quarkus application can utilize the MicroProfile Health specification through the SmallRye Health extension.
The health endpoint is used to check the health or state of the application that is running. This endpoint is generally configured with some monitoring tools to notify us if the instance is running as expected or goes down or behaving unusual for any particular reasons like Connectivity issues with Database, lack of disk space, etc.,
Below is the dependency that need to be included:
<dependency>
  <groupId>io.quarkus</groupId>
  <artifactId>quarkus-smallrye-health</artifactId>
</dependency>
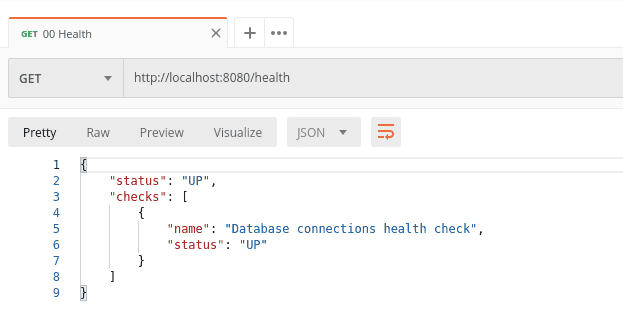
Below is the default response that would show up upon accessing //health endpoint if application is started successfully
{
    "status": "UP",
    "checks": [
        {
            "name": "Database connections health check",
            "status": "UP"
        }
    ]
}
org.eclipse.microprofile.health.HealthCheck is the interface which is used to collect the health information from all the implementing beans. Custom health indicator can be implemented to expose additional information.
Quarkus Metrics
Quarkus application can utilize the MicroProfile Metrics specification through the SmallRye Metrics extension.
MicroProfile Metrics allows applications to gather various metrics and statistics that provide insights into what is happening inside the application.
The metrics can be read remotely using JSON format or the OpenMetrics format, so that they can be processed by additional tools such as Prometheus, and stored for analysis and visualisation.
Below is the dependency that need to be included:
<dependency>
  <groupId>io.quarkus</groupId>
  <artifactId>quarkus-smallrye-metrics</artifactId>
</dependency>
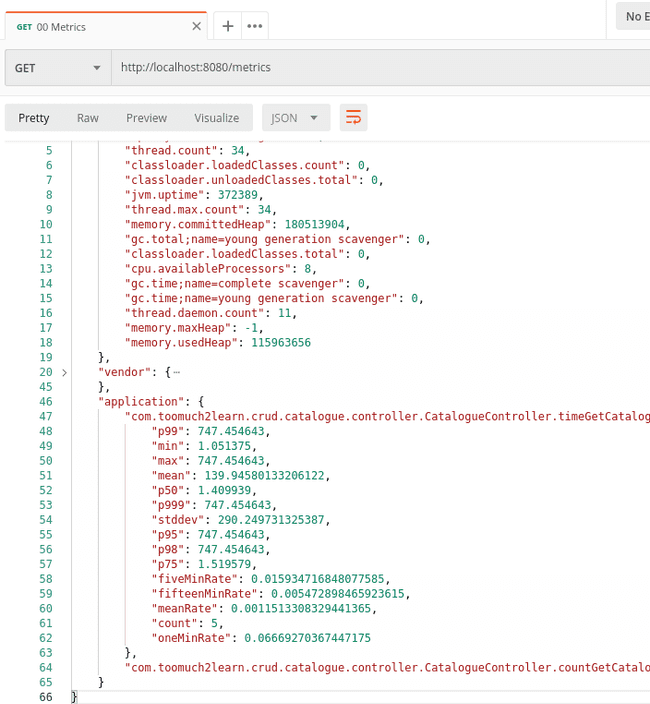
The /metrics endpoint will display the The metrics can be read remotely using JSON format or the OpenMetrics format, so that they can be processed by additional tools such as Prometheus, and stored for analysis and visualisation.
{
    "base": {
        "gc.total;name=PS MarkSweep": 3,
        "cpu.systemLoadAverage": 5.13,
        "thread.count": 109,
        ....
        ....
    },
    "vendor": {
        "jaeger_tracer_reporter_spans;result=err": 2,
        "memoryPool.usage;name=Metaspace": 68717096,
        "jaeger_tracer_reporter_spans;result=dropped": 0,
        ....
        ....
    }
}
Additionally, we can generate application metrics by adding below annotations
@Counted: A counter which is increased by one each time the user asks about a number.
@Timed: This is a timer, therefore a compound metric that benchmarks how much time the primality tests take. We will explain that one in more details later.
@GET
    @Path(CatalogueControllerAPIPaths.GET_ITEMS)
    @Counted(name = "countGetCatalogueItems", description = "Counts how many times the getCatalogueItems method has been invoked")
    @Timed(name = "timeGetCatalogueItems", description = "Times how long it takes to invoke the getCatalogueItems method", unit = MetricUnits.MILLISECONDS)
    public Response getCatalogueItems() throws Exception {
        log.info("Getting Catalogue Items");
        return Response.ok(new CatalogueItemList(catalogueCrudService.getCatalogueItems())).build();
    }
This will generate below response when accessing /metrics/application endpoint:
{
    "com.toomuch2learn.crud.catalogue.controller.CatalogueController.timeGetCatalogueItems": {
        "p99": 425.205561,
        "min": 2.546167,
        "max": 425.205561,
        "mean": 49.49157467579767,
        "p50": 3.400761,
        "p999": 425.205561,
        "stddev": 126.34344559981842,
        "p95": 425.205561,
        "p98": 425.205561,
        "p75": 13.39301,
        "fiveMinRate": 0.013924937717088982,
        "fifteenMinRate": 0.007742537014410643,
        "meanRate": 0.01684289108492676,
        "count": 9,
        "oneMinRate": 0.0032367329593715704
    },
    "com.toomuch2learn.crud.catalogue.controller.CatalogueController.countGetCatalogueItems": 9
}
And few other extensions..
Below are few additional dependencies added to interact with other supporting tools to capture logs and traces:
Support for Centralized Logging with Graylog
Quarkus provides capabilities to send application logs to a centralized log management system like Graylog, Logstash (inside the Elastic Stack or ELK - Elasticsearch, Logstash, Kibana) or Fluentd (inside EFK - Elasticsearch, Fluentd, Kibana). For simplicity for this article, we are using Graylog which is covered in the Prerequisites section.
In this article, we will use quarkus-logging-gelf extension that can use TCP or UDP to send logs in the Graylog Extended Log Format (GELF).
Below is the dependency that need to be included:
<dependency>
  <groupId>io.quarkus</groupId>
  <artifactId>quarkus-logging-gelf</artifactId>
</dependency>
The quarkus-logging-gelf extension will add a GELF log handler to the underlying logging backend that Quarkus uses (jboss-logmanager). By default, it is disabled.
Adding below configuration will enable logs to be sent to Graylog running on 12201 port on localhost:
quarkus:
  # Logging configuration
  log:
    # Send logs to Graylog
    handler:
      gelf:
        enabled: true
        host: localhost
        port: 12201
Support for Distributed tracing with Jaeger
Quarkus application can utilize OpenTracing to provide distributed tracing for interactive web applications.
With smallrye-opentracing extension added to the application, it gets support for OpenTracing with the default set to Jaeger tracer.
Below is the dependency that need to be included to track tracing for all interactions along with jdbc calls:
<dependency>
  <groupId>io.quarkus</groupId>
  <artifactId>quarkus-smallrye-opentracing</artifactId>
</dependency>
<dependency>
  <groupId>io.opentracing.contrib</groupId>
  <artifactId>opentracing-jdbc</artifactId>
</dependency>
Adding below configuration will publish traces to Jaeger with service name catalogue-crud:
jaeger:
  service-name: catalogue-crud
  sampler-type: const
  sampler-param: 1
Support for Unit/Integration Testing
quarkus-junit5 is required for testing, as it provides the @QuarkusTest annotation that controls the testing framework.
rest-assured is not required but is a convenient way to test HTTP endpoints, we also provide integration that automatically sets the correct URL so no configuration is required.
As we are using JDBC connecting to Postgres and publishing/subscribing to Kafka Topics, performing integration testing might be challange. To ease it up, Adding Testcontainers dependency will run throwaway instances of database, kafka cluster or anything else that can run in a Docker container.
Below are the dependencies needed for unit/integration testing:
<dependency>
  <groupId>io.quarkus</groupId>
  <artifactId>quarkus-junit5</artifactId>
  <scope>test</scope>
</dependency>
<dependency>
  <groupId>io.rest-assured</groupId>
  <artifactId>rest-assured</artifactId>
  <scope>test</scope>
</dependency>

<!-- Test Containers for unit testing with database-->
<dependency>
  <groupId>org.testcontainers</groupId>
  <artifactId>testcontainers</artifactId>
  <version>1.13.0</version>
  <scope>test</scope>
</dependency>
<dependency>
  <groupId>org.testcontainers</groupId>
  <artifactId>postgresql</artifactId>
  <version>1.13.0</version>
  <scope>test</scope>
</dependency>
<dependency>
  <groupId>org.testcontainers</groupId>
  <artifactId>kafka</artifactId>
  <version>1.13.0</version>
  <scope>test</scope>
</dependency>
To route calls to provisioned test database during tests, we need to configure the datasource for test profile as below:
### Test Configuration ####
"%test":
  quarkus:
    # Datasource configuration
    datasource:
      db-kind: postgresql
      url: jdbc:tc:postgresql:latest:///cataloguedb
    hibernate-orm:
      dialect: org.hibernate.dialect.PostgreSQL9Dialect
      database:
        generation: drop-and-create
For mocking up Kafka calls to Test Containers, we need to implement QuarkusTestResourceLifecycleManager and map to Test Containers Kafa Instance.
public class KafkaResource implements QuarkusTestResourceLifecycleManager {

    private final KafkaContainer KAFKA = new KafkaContainer();

    @Override
    public Map<String, String> start() {
        KafkaContainer KAFKA = new KafkaContainer();
        KAFKA.start();
        System.setProperty("kafka.bootstrap.servers", KAFKA.getBootstrapServers());
        return Collections.emptyMap();
    }

    @Override
    public void stop() {
        System.clearProperty("kafka.bootstrap.servers");
        KAFKA.close();
    }
}
Updating Maven and Gradle files
Below is pom.xml and build.gradle defined with all the dependencies and plugins needed for this application.
Maven
<?xml version="1.0"?>
<project xsi:schemaLocation="http://maven.apache.org/POM/4.0.0 https://maven.apache.org/xsd/maven-4.0.0.xsd" xmlns="http://maven.apache.org/POM/4.0.0"
    xmlns:xsi="http://www.w3.org/2001/XMLSchema-instance">
  <modelVersion>4.0.0</modelVersion>
  <groupId>com.toomuch2learn</groupId>
  <artifactId>catalogue-crud</artifactId>
  <version>1.0.0-SNAPSHOT</version>
  <properties>
    <compiler-plugin.version>3.8.1</compiler-plugin.version>
    <maven.compiler.parameters>true</maven.compiler.parameters>
    <maven.compiler.source>1.8</maven.compiler.source>
    <maven.compiler.target>1.8</maven.compiler.target>
    <project.build.sourceEncoding>UTF-8</project.build.sourceEncoding>
    <project.reporting.outputEncoding>UTF-8</project.reporting.outputEncoding>
    <quarkus-plugin.version>1.3.2.Final</quarkus-plugin.version>
    <quarkus.platform.artifact-id>quarkus-universe-bom</quarkus.platform.artifact-id>
    <quarkus.platform.group-id>io.quarkus</quarkus.platform.group-id>
    <quarkus.platform.version>1.3.2.Final</quarkus.platform.version>
    <surefire-plugin.version>2.22.1</surefire-plugin.version>
  </properties>
  <dependencyManagement>
    <dependencies>
      <dependency>
        <groupId>${quarkus.platform.group-id}</groupId>
        <artifactId>${quarkus.platform.artifact-id}</artifactId>
        <version>${quarkus.platform.version}</version>
        <type>pom</type>
        <scope>import</scope>
      </dependency>
    </dependencies>
  </dependencyManagement>
  <dependencies>
    <dependency>
      <groupId>io.quarkus</groupId>
      <artifactId>quarkus-resteasy</artifactId>
    </dependency>
    <dependency>
      <groupId>io.quarkus</groupId>
      <artifactId>quarkus-jdbc-postgresql</artifactId>
    </dependency>
    <dependency>
      <groupId>io.quarkus</groupId>
      <artifactId>quarkus-hibernate-validator</artifactId>
    </dependency>
    <dependency>
      <groupId>io.quarkus</groupId>
      <artifactId>quarkus-hibernate-orm-panache</artifactId>
    </dependency>
    <dependency>
      <groupId>io.quarkus</groupId>
      <artifactId>quarkus-resteasy-jackson</artifactId>
    </dependency>
    <dependency>
      <groupId>io.quarkus</groupId>
      <artifactId>quarkus-config-yaml</artifactId>
    </dependency>
    <dependency>
      <groupId>io.quarkus</groupId>
      <artifactId>quarkus-smallrye-health</artifactId>
    </dependency>
    <dependency>
      <groupId>io.quarkus</groupId>
      <artifactId>quarkus-smallrye-metrics</artifactId>
    </dependency>

    <!-- Tracing -->
    <dependency>
      <groupId>io.quarkus</groupId>
      <artifactId>quarkus-smallrye-opentracing</artifactId>
    </dependency>
    <dependency>
      <groupId>io.opentracing.contrib</groupId>
      <artifactId>opentracing-jdbc</artifactId>
    </dependency>

    <!-- Logging -->
    <dependency>
      <groupId>io.quarkus</groupId>
      <artifactId>quarkus-logging-gelf</artifactId>
    </dependency>

    <!-- Kafka Extension -->
    <dependency>
      <groupId>io.quarkus</groupId>
      <artifactId>quarkus-smallrye-reactive-messaging-kafka</artifactId>
    </dependency>

    <dependency>
      <groupId>org.apache.commons</groupId>
      <artifactId>commons-lang3</artifactId>
      <version>3.10</version>
    </dependency>
    <dependency>
      <groupId>org.projectlombok</groupId>
      <artifactId>lombok</artifactId>
      <version>1.18.12</version>
      <scope>provided</scope>
    </dependency>
    <dependency>
      <groupId>io.quarkus</groupId>
      <artifactId>quarkus-junit5</artifactId>
      <scope>test</scope>
    </dependency>
    <dependency>
      <groupId>io.rest-assured</groupId>
      <artifactId>rest-assured</artifactId>
      <scope>test</scope>
    </dependency>

    <!-- Test Containers for unit testing with database-->
    <dependency>
      <groupId>org.testcontainers</groupId>
      <artifactId>testcontainers</artifactId>
      <version>1.13.0</version>
      <scope>test</scope>
    </dependency>
    <dependency>
      <groupId>org.testcontainers</groupId>
      <artifactId>postgresql</artifactId>
      <version>1.13.0</version>
      <scope>test</scope>
    </dependency>
    <dependency>
      <groupId>org.testcontainers</groupId>
      <artifactId>kafka</artifactId>
      <version>1.13.0</version>
      <scope>test</scope>
    </dependency>
  </dependencies>
  <build>
    <plugins>
      <plugin>
        <groupId>io.quarkus</groupId>
        <artifactId>quarkus-maven-plugin</artifactId>
        <version>${quarkus-plugin.version}</version>
        <executions>
          <execution>
            <goals>
              <goal>build</goal>
            </goals>
          </execution>
        </executions>
      </plugin>
      <plugin>
        <artifactId>maven-compiler-plugin</artifactId>
        <version>${compiler-plugin.version}</version>
      </plugin>
      <plugin>
        <artifactId>maven-surefire-plugin</artifactId>
        <version>${surefire-plugin.version}</version>
        <configuration>
          <systemProperties>
            <java.util.logging.manager>org.jboss.logmanager.LogManager</java.util.logging.manager>
          </systemProperties>
        </configuration>
      </plugin>
      <!-- Add JaCoCo plugin which is prepare agent and also generate report once test phase is completed-->
      <plugin>
        <groupId>org.jacoco</groupId>
        <artifactId>jacoco-maven-plugin</artifactId>
        <version>0.8.5</version>
        <executions>
          <execution>
            <goals>
              <goal>prepare-agent</goal>
            </goals>
          </execution>
          <execution>
            <id>report</id>
            <phase>test</phase>
            <goals>
              <goal>report</goal>
            </goals>
          </execution>
        </executions>
      </plugin>
    </plugins>
  </build>
  <profiles>
    <profile>
      <id>native</id>
      <activation>
        <property>
          <name>native</name>
        </property>
      </activation>
      <build>
        <plugins>
          <plugin>
            <artifactId>maven-failsafe-plugin</artifactId>
            <version>${surefire-plugin.version}</version>
            <executions>
              <execution>
                <goals>
                  <goal>integration-test</goal>
                  <goal>verify</goal>
                </goals>
                <configuration>
                  <systemProperties>
                    <native.image.path>${project.build.directory}/${project.build.finalName}-runner</native.image.path>
                  </systemProperties>
                </configuration>
              </execution>
            </executions>
          </plugin>
        </plugins>
      </build>
      <properties>
        <quarkus.package.type>native</quarkus.package.type>
      </properties>
    </profile>
  </profiles>
</project>
Gradle
plugins {
    id 'java'
    id 'io.quarkus'
	id 'jacoco'
	id "io.freefair.lombok" version "5.0.0-rc2"
}

repositories {
     mavenLocal()
     mavenCentral()
}

dependencies {

	implementation 'org.projectlombok:lombok:1.18.12'

	implementation 'io.quarkus:quarkus-config-yaml'
	implementation 'io.quarkus:quarkus-smallrye-health'
    implementation 'io.quarkus:quarkus-smallrye-metrics'
	implementation 'io.quarkus:quarkus-logging-gelf'
	implementation 'io.quarkus:quarkus-smallrye-opentracing'
	implementation 'io.quarkus:quarkus-smallrye-reactive-messaging-kafka'

    implementation 'io.quarkus:quarkus-resteasy'
	implementation 'io.quarkus:quarkus-resteasy-jackson'

	implementation 'io.quarkus:quarkus-jdbc-postgresql'
	implementation 'io.quarkus:quarkus-hibernate-orm-panache'
    implementation 'io.quarkus:quarkus-hibernate-validator'

	implementation 'io.opentracing.contrib:opentracing-jdbc'

	implementation 'org.apache.commons:commons-lang3:3.10'

	implementation enforcedPlatform("${quarkusPlatformGroupId}:${quarkusPlatformArtifactId}:${quarkusPlatformVersion}")

	testImplementation 'io.quarkus:quarkus-junit5'
    testImplementation 'io.rest-assured:rest-assured'

	testImplementation 'org.testcontainers:testcontainers:1.13.0'
	testImplementation 'org.testcontainers:postgresql:1.13.0'
	testImplementation 'org.testcontainers:kafka:1.13.0'
}

group 'com.toomuch2learn'
version '1.0.0-SNAPSHOT'

group 'com.toomuch2learn'
version '1.0.0-SNAPSHOT'
description 'crud-catalogue'

compileJava {
    options.encoding = 'UTF-8'
    options.compilerArgs << '-parameters'
}

compileTestJava {
    options.encoding = 'UTF-8'
}

java {
    sourceCompatibility = JavaVersion.VERSION_1_8
    targetCompatibility = JavaVersion.VERSION_1_8
}

jacocoTestReport {
    reports {
        html.destination file("${buildDir}/jacocoHtml")
    }
}
Context & Dependency Injection
For this application, we are relying on Quarkus DI which is based on the Contexts and Dependency Injection for Java 2.0 specification.
With Quarkus DI in place, we are completly eliminating Spring Framework for this article.
Refer to this article for further reading on understanding different aspects to consider for successfully using CDI in our applications.
Configure Postgres database and define JPA Entity
Update application.yml with the below datasource configurations to use Postgres database:
quarkus:

  # Datasource configuration
  datasource:
    db-kind: postgresql
    username: postgres
    password: password
    jdbc:
      driver: io.opentracing.contrib.jdbc.TracingDriver
      url: jdbc:tracing:postgresql://0.0.0.0:5432/cataloguedb
      min-size: 5
      max-size: 12

  # Hibernate ORM configuration
  hibernate-orm:
    database:
      generation: drop-and-create
As you can observe, JDBC driver and url contains tracing. This is to ensure that JDBC calls are linked to the traces that are captured part of the API calls. If tracing is not needed for JDBC calls, delete the line for driver property and remove tracing: from url.
Define JPA entity as per the below table definition for CATALOGUE_ITEMS:
| Column | Datatype | Nullable |
|---|---|---|
| ID | INT PRIMARY KEY | No |
| SKU_NUMBER | VARCHAR(16) | No |
| ITEM_NAME | VARCHAR(255) | No |
| DESCRIPTION | VARCHAR(500) | No |
| CATEGORY | VARCHAR(255) | No |
| PRICE | DOUBLE | No |
| INVENTORY | INT | No |
| CREATED_ON | DATETIME | No |
| UPDATED_ON | DATETIME | Yes |
package com.toomuch2learn.crud.catalogue.model;

import com.toomuch2learn.crud.catalogue.validation.IEnumValidator;
import lombok.*;

import javax.persistence.*;
import javax.validation.constraints.NotEmpty;
import javax.validation.constraints.NotNull;
import java.util.Date;

@Data
@NoArgsConstructor
@AllArgsConstructor
@RequiredArgsConstructor(staticName = "of")
@Entity
@Table(name = "CATALOGUE_ITEMS",
    uniqueConstraints = {
        @UniqueConstraint(columnNames = "SKU_NUMBER")
})
public class CatalogueItem {

    @Id
    @GeneratedValue(strategy = GenerationType.IDENTITY)
    @Column(name = "ID", unique = true, nullable = false)
    private Long id;

    @NotEmpty(message = "SKU cannot be null or empty")
    @NonNull
    @Column(name = "SKU_NUMBER", unique = true, nullable = false, length = 16)
    private String sku;

    @NotEmpty(message = "Name cannot be null or empty")
    @NonNull
    @Column(name = "ITEM_NAME", unique = true, nullable = false, length = 255)
    private String name;

    @NotEmpty(message = "Description cannot be null or empty")
    @NonNull
    @Column(name = "DESCRIPTION", nullable = false, length = 500)
    private String description;

    @NonNull
    @Column(name = "CATEGORY", nullable = false)
    @IEnumValidator(
        enumClazz = Category.class,
        message = "Invalid category provided"
    )
    private String category;

    @NotNull(message = "Price cannot be null or empty")
    @NonNull
    @Column(name = "PRICE", nullable = false, precision = 10, scale = 2)
    private Double price;

    @NotNull(message = "Inventory cannot be null or empty")
    @NonNull
    @Column(name = "INVENTORY", nullable = false)
    private Integer inventory;

    @NonNull
    @Temporal(TemporalType.TIMESTAMP)
    @Column(name = "CREATED_ON", nullable = false, length = 19)
    private Date createdOn;

    @Temporal(TemporalType.TIMESTAMP)
    @Column(name = "UPDATED_ON", nullable = true, length = 19)
    private Date updatedOn;
}
JPA Panache Repository
Java Persistence API a.k.a JPA handles most of the complexity of JDBC-based database access and object-relational mappings. On top of that, Hibernate ORM with Panache reduces the amount of boilerplate code required by JPA which makes the implementation of our persistence layer easier and faster.
JPA is a specification that defines an API for object-relational mappings and for managing persistent objects. Hibernate and EclipseLink are two most popular implementations of JPA specification.
Panache supports JPA specification allowing us to define the entities and association mappings, the entity lifecycle management, and JPA’s query capabilities. Panache adds an additional layer on top of JPA by providing no-code implementation of a PanacheRepository which defines the repository with all logical read and write operations for a specific entity.
What to define in a Repository Interface?
Repository class should at minimum define the below 4 methods:
- Save a new or updated Entity
- Delete an entity,
- Find an entity by its Primary Key
- Find an entity by its title.
These operations are basically related to CRUD functions for managing an entity. Additional to these, we can further enhance the interface by defining methods to fetch data by pagination, sorting, count etc.,
Quarkus PanacheRepository includes all these capabilities by extending to our.
In this article, we will create CatalogueRepository which implements PanacheRepository as below
package com.toomuch2learn.crud.catalogue.repository;

import com.toomuch2learn.crud.catalogue.model.CatalogueItem;
import io.quarkus.hibernate.orm.panache.PanacheRepository;

import javax.enterprise.context.ApplicationScoped;
import java.util.Optional;

@ApplicationScoped
public class CatalogueRepository implements PanacheRepository<CatalogueItem> {

    public Optional<CatalogueItem> findBySku(String sku) {
        return find("sku", sku).singleResultOptional();
    }
}
As observed above, we defined additional method to fetch Catalogue Item by its SKU as per the requirement providing capabilitu to find the record by field sku as defined in the entity object.
Refer to Advanced Query section for further capabilities like paging, sorting, HQL Queries etc.,
JAX-RS Controller
Controllers are implemented using RESTeasy JAX-RS which is the default for Quarkus.
Below is part of the CatalogueController portraying the class and methods with annotations to handle Restful request to fetch Catalogue Item by SKU Number.
@Path(CatalogueControllerAPIPaths.BASE_PATH)
@Produces(MediaType.APPLICATION_JSON)
public class CatalogueController {

  private Logger log = LoggerFactory.getLogger(CatalogueController.class);

  @Inject
  CatalogueCrudService catalogueCrudService;

  @GET
  @Path(CatalogueControllerAPIPaths.GET_ITEMS)
  @Counted(name = "countGetCatalogueItems", description = "Counts how many times the getCatalogueItems method has been invoked")
  @Timed(name = "timeGetCatalogueItems", description = "Times how long it takes to invoke the getCatalogueItems method", unit = MetricUnits.MILLISECONDS)
  public Response getCatalogueItems() throws Exception {
      log.info("Getting Catalogue Items");
      return Response.ok(new CatalogueItemList(catalogueCrudService.getCatalogueItems())).build();
  }

  @POST
  @Path(CatalogueControllerAPIPaths.CREATE)
  public Response addCatalogueItem(@Valid CatalogueItem catalogueItem) throws Exception{
      log.info(String.format("Adding Catalogue Item with sku : %s", catalogueItem.getSku()));

      Long id = catalogueCrudService.addCatalogItem(catalogueItem);

      return Response.status(Response.Status.CREATED).entity(new ResourceIdentity(id)).build() ;
  }
}
As observed above,
- Additional Service layer is Introduced with class
CatalogueCrudServicewhich abstracts calls to data access layers from the controller class. - Handler methods are annotated with @GET or @POST specifing the request http method they support.
- Path are defined as static variables in
CatalogueControllerAPIPathsand are used in Controller class. This will ensure all paths are defined at one place and clearly indicate what operations are available in the controller class instead of moving around the class up and down. @Validannotation is used inaddCatalogueItemensuring the request body received is validated by Bean Validation Framework before processing the request.
Below is the complete implementation of the Controller class:
package com.toomuch2learn.crud.catalogue.controller;

public class CatalogueControllerAPIPaths {

    public static final String BASE_PATH = "/api/v1";

    public static final String CREATE = "/";
    public static final String GET_ITEMS = "/";
    public static final String GET_ITEM = "/{sku}";
    public static final String UPDATE = "/{sku}";
    public static final String DELETE = "/{sku}";
    public static final String UPLOAD_IMAGE = "/{sku}/image";
}package com.toomuch2learn.crud.catalogue.controller;
import com.toomuch2learn.crud.catalogue.exception.ResourceNotFoundException;
import com.toomuch2learn.crud.catalogue.model.CatalogueItem;
import com.toomuch2learn.crud.catalogue.model.CatalogueItemList;
import com.toomuch2learn.crud.catalogue.model.ResourceIdentity;
import com.toomuch2learn.crud.catalogue.service.CatalogueCrudService;
import org.eclipse.microprofile.metrics.MetricUnits;
import org.eclipse.microprofile.metrics.annotation.Counted;
import org.eclipse.microprofile.metrics.annotation.Timed;
import org.slf4j.Logger;
import org.slf4j.LoggerFactory;
import javax.inject.Inject;
import javax.validation.Valid;
import javax.ws.rs.*;
import javax.ws.rs.core.MediaType;
import javax.ws.rs.core.Response;
@Path(CatalogueControllerAPIPaths.BASE_PATH)
@Produces(MediaType.APPLICATION_JSON)
public class CatalogueController {
private Logger log = LoggerFactory.getLogger(CatalogueController.class);
@Inject
CatalogueCrudService catalogueCrudService;
@GET
@Path(CatalogueControllerAPIPaths.GET_ITEMS)
@Counted(name = "countGetCatalogueItems", description = "Counts how many times the getCatalogueItems method has been invoked")
@Timed(name = "timeGetCatalogueItems", description = "Times how long it takes to invoke the getCatalogueItems method", unit = MetricUnits.MILLISECONDS)
public Response getCatalogueItems() throws Exception {
log.info("Getting Catalogue Items");
return Response.ok(new CatalogueItemList(catalogueCrudService.getCatalogueItems())).build();
}
@GET
@Path(CatalogueControllerAPIPaths.GET_ITEM)
public Response
getCatalogueItemBySKU(@PathParam(value = "sku") String skuNumber)
throws ResourceNotFoundException, Exception {
log.info(String.format("Getting Catalogue Item by sku : %s", skuNumber));
return Response.ok(catalogueCrudService.getCatalogueItem(skuNumber)).build();
}
@POST
@Path(CatalogueControllerAPIPaths.CREATE)
public Response addCatalogueItem(@Valid CatalogueItem catalogueItem) throws Exception{
log.info(String.format("Adding Catalogue Item with sku : %s", catalogueItem.getSku()));
Long id = catalogueCrudService.addCatalogItem(catalogueItem);
return Response.status(Response.Status.CREATED).entity(new ResourceIdentity(id)).build() ;
}
@PUT
@Path(CatalogueControllerAPIPaths.UPDATE)
public Response updateCatalogueItem(
@PathParam(value = "sku") String skuNumber,
@Valid CatalogueItem catalogueItem) throws ResourceNotFoundException, Exception {
log.info(String.format("Updating Catalogue Item with sku : %s", catalogueItem.getSku()));
catalogueCrudService.updateCatalogueItem(catalogueItem);
return Response.ok().build();
}
@DELETE
@Path(CatalogueControllerAPIPaths.DELETE)
public Response removeCatalogItem(@PathParam(value = "sku") String skuNumber) throws ResourceNotFoundException, Exception {
log.info(String.format("Removing Catalogue Item with sku : %s", skuNumber));
catalogueCrudService.deleteCatalogueItem(skuNumber);
return Response.status(Response.Status.NO_CONTENT).build();
}
}Event Driven Implementation with Kafka
Apart from RESTful services implemented with JAX-RS, event-driven architecture is incorporated for services to communicate each-other via event messages published to Kafka topics.
Quarkus application utilizes MicroProfile Reactive Messaging. Implementation at the core is SmallRye Reactive Messaging which is a framework for building event-driven, data streaming, and event-sourcing applications using CDI. It lets your application interaction using various messaging technologies such as Apache Kafka, AMQP or MQTT. The framework provides a flexible programming model bridging CDI and event-driven.
For the purpose of exploring reactive messaging with Kafka, we are looking at handling one incoming message and publish one outcoming message to individual Kafka Topics.
Before proceeding with this, ensure to bootstrap Kafka Cluster using docker-compose and test drive to see if cluster is provisioned successfully.
| Topic | Type |
|---|---|
| product-purchased | Incoming |
| price-updated | Outgoing |
Handling Incoming Message
Application is configured to handle incoming message for product-purchased event. Consider there is an Ordering service from which customers purchase aproduct that is listed in catalogue database. When a product is purchased, we need to decrement it from inventory to ensure customers don’t try to purchase product and do not have enough stock in inventory.
sku of the product will be published to product-purchased topic with which we decerement inventory in the database.
To handle this, we need to create product-purchased topic and subscribe to it by configuring it in application.yaml and annoate the handler with @Incoming annotation.
# Kafka Messages
mp:
  messaging:
    incoming:
      product-purchased:
        connector: smallrye-kafka
        topic: product-purchased        value:
deserializer: org.apache.kafka.common.serialization.StringDeserializerpackage com.toomuch2learn.crud.catalogue.event;
import com.toomuch2learn.crud.catalogue.service.CatalogueCrudService;
import io.quarkus.runtime.StartupEvent;
import org.eclipse.microprofile.reactive.messaging.Incoming;
import org.slf4j.Logger;
import org.slf4j.LoggerFactory;
import javax.enterprise.context.ApplicationScoped;
import javax.enterprise.event.Observes;
import javax.inject.Inject;
import java.util.concurrent.*;
@ApplicationScoped
public class ProductPurchasedReceivedEvent {
private Logger log = LoggerFactory.getLogger(ProductPurchasedReceivedEvent.class);
@Inject
CatalogueCrudService catalogueCrudService;
private ExecutorService executor;
private BlockingQueue<String> messages;
void startup(@Observes StartupEvent event) {
log.info("========> ProductPurchasedReceivedEvent startup");
messages = new LinkedBlockingQueue<>();
ScheduledExecutorService executor = Executors.newScheduledThreadPool(5);
executor.scheduleAtFixedRate(() -> {
if (messages.size() > 0) {
log.error("====> purchased products available");
try {
catalogueCrudService.productPurchased(messages.take());
} catch (InterruptedException e) {
throw new RuntimeException(e);
}
}
}, 1000, 2000, TimeUnit.MILLISECONDS);
}
@Incoming("product-purchased") public void productPurchased(String skuNumber) {
log.error("=====> Purchased product received for skuNumber :: "+skuNumber);
messages.add(skuNumber); }
}When sku is published to product-purchased kafka topic, handler method registered with @Incoming annotation will be invoked with the serialized value passed as argument. In order to handle multiple messages asynchronously, we are adding all the incoming skus to BlockingQueue and handle them to be processed by ScheduledExecutorService which runs at fixed interval to pull the messages from the queue and pass it to CatalogueCrudService to decrement inventory.
As observed, ProductPurchasedReceivedEvent is marked with application scope. This is to capture the startup event and initialize ScheduledExecutorService to start processing the messages added to the queue.
Publishing Outgoing Message
Application is configured to publish outgoing message for price-updated event. Consider there is an Online Shopping application being used by customers to purchase products managed in catalogue service. If one such product is added to the cart by customer and its price gets revised in Catalogue service at the same time, Online Shopping application should be notified so that the total price can be updated before customer proceeds to purchase section.
When product is being updated, we verify there is change in price compared to what is available in database. If difference in price exists, then post updating the entry in database, event is published to the topic with object containing product sku and price.
For this, we need to create price-updated topic and publish the message by configuring the topic in application.yaml and annoate the publish method with @Outgoing annotation.
mp:
  messaging:
    outgoing:
      price-updated:
        connector: smallrye-kafka
        topic: price-updated        value:
serializer: io.quarkus.kafka.client.serialization.ObjectMapperSerializerpackage com.toomuch2learn.crud.catalogue.event;
import com.toomuch2learn.crud.catalogue.model.ProductPrice;
import org.eclipse.microprofile.reactive.messaging.Message;
import org.eclipse.microprofile.reactive.messaging.Outgoing;
import org.slf4j.Logger;
import org.slf4j.LoggerFactory;
import javax.enterprise.context.ApplicationScoped;
import java.util.concurrent.BlockingQueue;
import java.util.concurrent.CompletableFuture;
import java.util.concurrent.CompletionStage;
import java.util.concurrent.LinkedBlockingQueue;
@ApplicationScoped
public class ProductPriceUpdatedEvent {
private Logger log = LoggerFactory.getLogger(ProductPriceUpdatedEvent.class);
private BlockingQueue<ProductPrice> messages = new LinkedBlockingQueue<>();
public void add(ProductPrice message) {
messages.add(message); }
@Outgoing("price-updated") public CompletionStage<Message<ProductPrice>> send() {
return CompletableFuture.supplyAsync(() -> {
try {
ProductPrice productPrice = messages.take();
log.error("Publishing event for updated product: " + productPrice);
return Message.of(productPrice); } catch (InterruptedException e) {
throw new RuntimeException(e);
}
});
}
}@InjectProductPriceUpdatedEvent productPriceUpdatedEvent;
@Transactional
public void updateCatalogueItem(CatalogueItem catalogueItem) throws ResourceNotFoundException{
CatalogueItem catalogueItemfromDB = getCatalogueItemBySku(catalogueItem.getSku());
boolean priceDifference = catalogueItemfromDB.getPrice() != catalogueItem.getPrice();
catalogueItemfromDB.setName(catalogueItem.getName());
catalogueItemfromDB.setDescription(catalogueItem.getDescription());
catalogueItemfromDB.setPrice(catalogueItem.getPrice());
catalogueItemfromDB.setInventory(catalogueItem.getInventory());
catalogueItemfromDB.setUpdatedOn(new Date());
// Publish item if price change
if(priceDifference) { log.info("===> Price is difference with database"); productPriceUpdatedEvent.add(new ProductPrice(catalogueItem.getSku(), catalogueItem.getPrice())); }
catalogueRepository.persist(catalogueItemfromDB);
}As observed, ProductPriceUpdatedEvent is the class which publishes the messages for this event. Method annotated with @Outgoing is a Reactive Streams publisher and so publishes messages according to the requests it receives.
Annotated method cannot be defined with any arguments as this method will be polled by the framework to publish any new messages.And hence we had to introduce BlockingQueue to capture all ProductPrice instances via add() method from CatalogueCrudService class when handling catalogue item update request..
ObjectMapperSerializer serialization is performed on ProductPrice object before writing the message to the topic as configured in application.yaml.
Handling Exceptions
Exception Handling is done with ExceptionMapper with JAX-RS. RESTEasy ExceptionMappers are custom, application provided, components that can catch thrown application exceptions and write specific HTTP responses. The are classes annotated with @Provider and that implement this interface.
When an application exception is thrown it will be caught by the JAX-RS runtime. JAX-RS will then scan registered ExceptionMappers to see which one support marshalling the exception type thrown.
Below is one such ExceptionMapper which handles ConstraintViolationException when there are any validation errors identified in request body:
@Provider
public class ConstraintViolationExceptionMapper implements ExceptionMapper<ConstraintViolationException> {

  @Override
  public Response toResponse(ConstraintViolationException e) {
      ErrorResponse error = new ErrorResponse();
      for (ConstraintViolation violation : e.getConstraintViolations()) {
          error.getErrors().add(
            new Error(
              ErrorCodes.ERR_CONSTRAINT_CHECK_FAILED,
              violation.getPropertyPath().toString(),
              violation.getMessage())
        );
      }

      return Response.status(Response.Status.BAD_REQUEST).entity(error).build();
  }
}
As observed,
- Class is annotated with
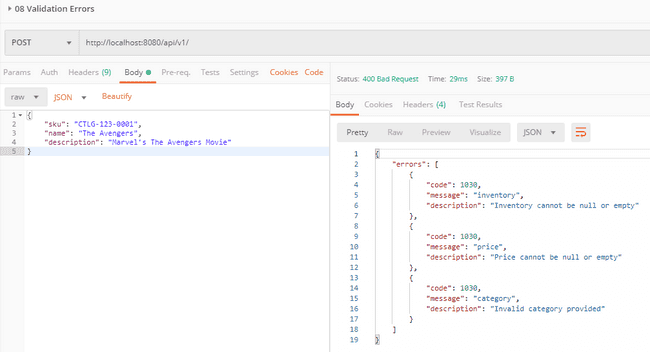
@Provider. Errorinstance is created for each constraint violation and added toErrorResponse.Responseobject isbuiltwith status asBAD_REQUESTand the ErrorResponse object set toentity.
Below are few other ExceptionMappers created to handle different exceptions:
- InvalidFormatExceptionMapper.java
- NotFoundExceptionMapper.java
- RuntimeExceptionMapper.java
- ResourceNotFoundExceptionMapper.java handling application specific custom exception.
Testing with Quarkus
Quarkus supports Junit 5 by quarkus-junit5 extension. This extension is provided by default when code is generated from code.quarkus.io.
It Includes @QuarkusTest annotation that controls the testing framework. Annotating test classes with this annotation will start Quarkus application and listen on 8081 port compared to the default 8080 port.
We can point to different port used by tests by configuring quarkus.http.test-port in your application.yaml as below
quarkus:
  http:
    test-port: 8083
Including @QuarkusTest is considered to be more of an integration testing rather than unit testing.
Rather then mocking up different services to implement unit tests, we can use RestAssured to make HTTP calls, use Testcontainers to create throwaway instances of Docker Containers for booting up and using Postgres database, kafka cluster or anything else that can run on Docker.
Postgres and Kafka instances are provisioned by Testcontainers during test phase. Configuration for connecting to these provisioned instances are done in application.yaml for database and through configuration class by extending QuarkusTestResourceLifecycleManager.
- Configuring datasource to connect to Testcontainer provisioned database
### Test Configuration ####
"%test":
  quarkus:
    # Datasource configuration
    datasource:
      db-kind: postgresql
      jdbc:
        driver: org.testcontainers.jdbc.ContainerDatabaseDriver        url: jdbc:tc:postgresql:latest:///cataloguedb    hibernate-orm:
      dialect: org.hibernate.dialect.PostgreSQL9Dialect
      database:
        generation: drop-and-create
As highlighted, driver and url includes testcontainer specific configurations ensuring jdbc connectivity is done to provisioned database.
- Configuring tests to use provisoned Kafka cluster
Custom configuration class KafkaTestResource is created by extending QuarkusTestResourceLifecycleManager and implementing start and stop lifecycle methods.
Instance of org.testcontainers.containers.KafkaContainer is created and is started within start lifecycle method. Kafka bootstrap.servers configuration is registered with the bootstrap server details of the provisioned Testcontainer Kafka cluster. This will ensure to override the default configurations registered in application.yaml
package com.toomuch2learn.crud.catalogue.config;

import io.quarkus.test.common.QuarkusTestResourceLifecycleManager;
import org.testcontainers.containers.KafkaContainer;

import java.util.HashMap;
import java.util.Map;

public class KafkaTestResource implements QuarkusTestResourceLifecycleManager {

  private final KafkaContainer KAFKA = new KafkaContainer();
  @Override
  public Map<String, String> start() {
    KAFKA.start();
    System.setProperty("kafka.bootstrap.servers", KAFKA.getBootstrapServers());

    Map<String, String> map = new HashMap<>();
    map.put("mp.messaging.outgoing.price-updated.bootstrap.servers", KAFKA.getBootstrapServers());    map.put("mp.messaging.incoming.product-purchased.bootstrap.servers", KAFKA.getBootstrapServers());
    return map;
  }

  @Override
  public void stop() {
    System.clearProperty("kafka.bootstrap.servers");
    KAFKA.close();
  }
}
As mentioned earlier, Including @QuarkusTest is considered to be more of an Integration Testing rather than Unit Testing. Objective of these test classes is to try performing actual service calls and verify the outcome of the action performed rather than mocking up the services to validate the outcome.
Below are the test classes that are implemented part of this project.
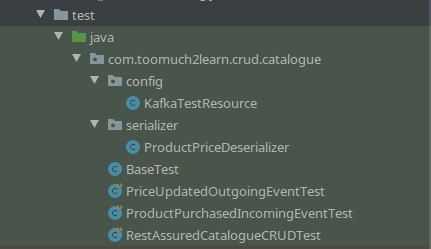
Creating Reusable methods
When defining test methods, the context of complete test execution should be wrapped within its own method. To test Update Catalogue Item, we need to create, update and then get the catalogue item to verify if item is actually updated or not.
This can lead to lot of code duplication as most of the tests would have to include creating the catalogue item before testing its context of execution. For code reusability, we need to create functional methods which can be called from the test methods and should not impact other tests.
Below is such reusable method which handles creating catalogue item request and returning the response.
private Response postCreateCatalogueItem(CatalogueItem catalogueItem) throws Exception {
  RequestSpecification request
    = given()
      .contentType("application/json")
      .body(catalogueItem);

  return request.post("/");
}
We should consider creating new instance of CatalogueItem created with unique values, else there will be unique constraint exceptions occurring in the application when persisting the catalogue items to the database. Below reusable methods are created to create Catalogue Item with fields assigned with distinct values.
// Create Catalogue Item
CatalogueItem catalogueItem = prepareCatalogueItem(prepareRandomSKUNumber());

final Random random = new Random();
private String prepareRandomSKUNumber() {
  return "SKUNUMBER-"+
    random.ints(1000, 9999)
      .findFirst()
      .getAsInt();
}

private CatalogueItem prepareCatalogueItem(String skuNumber) {
  CatalogueItem item
    = CatalogueItem.of(
      skuNumber,
      "Catalog Item -"+skuNumber,
      "Catalog Desc - "+skuNumber,
      Category.BOOKS.getValue(),
      10.00,
      10,
      new Date()
    );
  return item;
}
As observed, we created prepareRandomSKUNumber method to generate unique SKU number which will be passed to prepareCatalogueItem to create instance of Catalogue Item with random SKU number. This will ensure unique constraint fields are kept unique when executing tests.
And finally, we will be creating one more reusable method to create instance of ResponseSpecification based on the expected response HTTP Status code. This method will be used in all test classes to verify if the response received is with the expected response HTTP Status code.
private ResponseSpecification prepareResponseSpec(int responseStatus) {
    return new ResponseSpecBuilder()
        .expectStatusCode(responseStatus)
        .build();
}
All these methods are wrapped under BaseTest.java and extended to other test classes.
Testing REST endpoints
Test class RestAssuredCatalogueCRUDTest is defined to handle all tests against the RESTful APIs. It imports classes from JUnit5, REST-assured and Hamcrest to setup, access and validate APIs.
Below are the tests that are included as part of the Test class:
- Application Health Check
- Create Catalogue Item
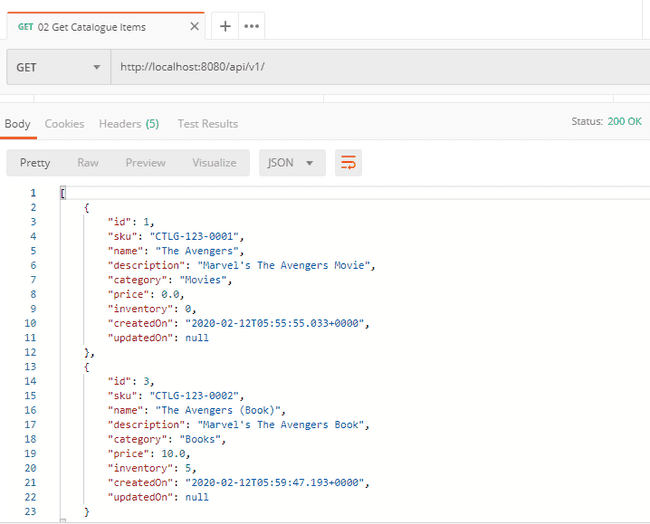
- Get Catalogue Items
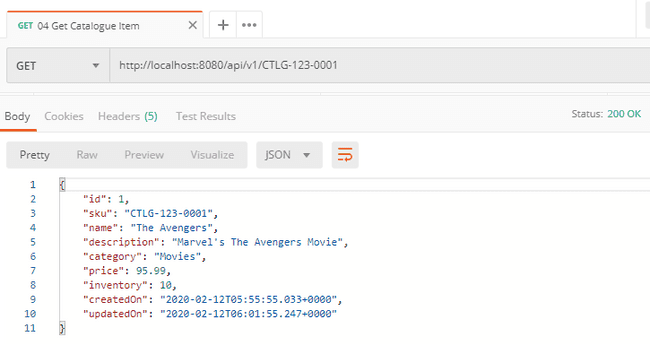
- Get Catalogue Item by SKU
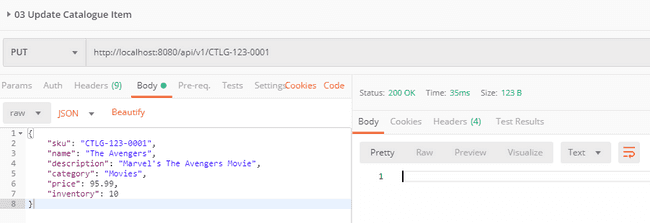
- Update Catalogue Item by SKU
- Delete Catalogue Item by SKU
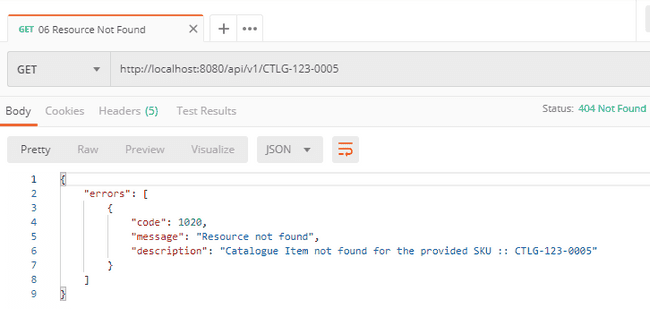
- Resource Not Found
- Handling Validation Errors
- Handling Invalid Request
With the common reusable code separated into BaseTest, implementing test methods will be easy by following the Given\When\Then syntax.
As all the tests are performed on the single API endpoints, they all share the same API Base URI. REST-assured provides a convenient way to configure this base uri to be used by all the tests.
@BeforeEach
public void setURL() {
    RestAssured.baseURI = "http://[::1]:8081/api/v1";
}Note: Rather than defining the baseURI before each test, we can configure static block and assign the value just once. But this is not being honored and unclear why. To focus on the overall implementation, this is parked aside for further analysis.
static {
  RestAssured.baseURI = "http://localhost:8080/api/v1";
}
Below is implementation of Update Catalogue Item by SKU:
Multiple operations are handled for update request. Create instance of CatalogueItem and send request to create it. Update few fields in the CatalogueItem and pass it to update it by its sku number. Now, access get request passing sku and validating if we are receiving the response body with updated field values.
@Test
@DisplayName("Test Update Catalogue Item")
public void test_updateCatalogueItem() {
  try {
    // Create Catalogue Item
    CatalogueItem catalogueItem = prepareCatalogueItem(prepareRandomSKUNumber());
    postCreateCatalogueItem(catalogueItem);

    // Update catalogue item
    catalogueItem.setName("Updated-"+catalogueItem.getName());
    catalogueItem.setDescription("Updated-"+catalogueItem.getDescription());

    given()
      .contentType("application/json")
      .body(catalogueItem)
      .pathParam("sku", catalogueItem.getSku())
    .when()
      .put("/{sku}")
    .then()
      .assertThat().spec(prepareResponseSpec(200));

    // Get updated catalogue item with the sku of the catalogue item that is created and compare the response fields
    given()
      .pathParam("sku", catalogueItem.getSku())
    .when()
      .get("/{sku}")
    .then()
      .assertThat().spec(prepareResponseSpec(200))
    .and()
      .assertThat().body("name", equalTo(catalogueItem.getName()))
    .and()
      .assertThat().body("category", equalTo(catalogueItem.getCategory()));
  }
  catch(Exception e) {
      fail("Error occurred while testing catalogue item update", e);
  }
}
Going through each test method would make this article even lengthy than what it is now. To cut short, Refer to source code for complete implementation of each test method.
Testing Kafka Events
With KafkaTestResource created to bootstrap Testcontainer Kafka cluster, we can perfom integration tests by publishing and consuming messages to topics and validate the functionality relying on them.
Tests are broken down to two different classes based on Incoming & Outgoing messages.
Incoming Message
As per the usecase defined for handling product-purchased event, we need to mimic a product is purchased from online shopping application and the inventory stock for that product should be deceremented in catalogue database.
Below is the sequence flow of the test
To mimic this, createProducer method includes creation of KafkaProducer instance with required configurations assigned to publish message to it in test method as per the sequence diagram defined above.
package com.toomuch2learn.crud.catalogue;

import io.quarkus.test.junit.QuarkusTest;
import org.apache.kafka.clients.producer.KafkaProducer;
...
...

@QuarkusTestResource(KafkaTestResource.class)
@QuarkusTest
@DisabledOnNativeImage
public class ProductPurchasedIncomingEventTest extends BaseTest{

    private Logger log = LoggerFactory.getLogger(PriceUpdatedOutgoingEventTest.class);

    public static Producer<String, String> createProducer() {
        Properties props = new Properties();
        props.put(ProducerConfig.BOOTSTRAP_SERVERS_CONFIG, System.getProperty("kafka.bootstrap.servers"));
        props.put(ProducerConfig.CLIENT_ID_CONFIG, "product-purchased");
        props.put(ProducerConfig.KEY_SERIALIZER_CLASS_CONFIG, StringSerializer.class.getName());
        props.put(ProducerConfig.VALUE_SERIALIZER_CLASS_CONFIG, StringSerializer.class.getName());

        return new KafkaProducer<String, String>(props);    }

    @Test
    public void testProductPurchasedIncomingEvent() throws Exception {
        RestAssured.baseURI = "http://[::1]:8081/api/v1";
        try {

            String sku = prepareRandomSKUNumber();

            // Create Catalogue Item
            CatalogueItem catalogueItem = prepareCatalogueItem(sku);
            postCreateCatalogueItem(catalogueItem);
            log.info(String.format("===> Producing product purchased event for %s", sku));
            Producer<String, String> producer = createProducer();
            producer.send(new ProducerRecord<>("product-purchased", "testcontainers", sku));
            // Wait for 10 seconds for the message to be handled by the application
            Thread.sleep(10000);
            log.info(String.format("===> Invocking get request for ", sku));

            // Get Catalogue item with the sku of the catalogue item that is created and compare the response fields
            Response response = given()                .pathParam("sku", sku)            .when()                .get("/{sku}");
            CatalogueItem getCatalogueItem = response.getBody().as(CatalogueItem.class);
            log.info(String.format("===> Received response for %s with inventory-%s", sku, getCatalogueItem.getInventory()));

            Assertions.assertEquals(getCatalogueItem.getInventory(), catalogueItem.getInventory() - 1);        }
        catch(Exception e) {
            fail("Error occurred while testing Product Purchased event", e);
        }
    }
}
Code highlighted depicts the sequence diagram.
Outgoing Message
As per the usecase defined to publish handling price-updated event, we need to mimic a product is updated with price differing to what is available in catalogue database and validate if message published to topic is inline to what is updated to database.
Below is the sequence flow of the test
To mimic this, createConsumer method includes creation of KafkaConsumer instance with required configurations assigned to subscribed to price-updated topic and consume published message as per the sequence diagram defined above.
package com.toomuch2learn.crud.catalogue;

import io.quarkus.test.junit.QuarkusTest;
import org.apache.kafka.clients.consumer.KafkaConsumer;
...
...

@QuarkusTestResource(KafkaTestResource.class)
@QuarkusTest
@DisabledOnNativeImage
public class PriceUpdatedOutgoingEventTest extends BaseTest{

    private Logger log = LoggerFactory.getLogger(PriceUpdatedOutgoingEventTest.class);

    public static KafkaConsumer<Integer, ProductPrice> createConsumer() {
        Properties props = new Properties();
        props.put(ConsumerConfig.BOOTSTRAP_SERVERS_CONFIG, System.getProperty("kafka.bootstrap.servers"));
        props.put(ConsumerConfig.ALLOW_AUTO_CREATE_TOPICS_CONFIG, "true");
        props.put(ConsumerConfig.GROUP_ID_CONFIG, "price-updated");
        props.put(ConsumerConfig.KEY_DESERIALIZER_CLASS_CONFIG, IntegerDeserializer.class.getName());
        props.put(ConsumerConfig.VALUE_DESERIALIZER_CLASS_CONFIG, ProductPriceDeserializer.class.getName());
        props.put(ConsumerConfig.ENABLE_AUTO_COMMIT_CONFIG, "true");
        props.put(ConsumerConfig.AUTO_OFFSET_RESET_CONFIG, "earliest");

        KafkaConsumer<Integer, ProductPrice> consumer = new KafkaConsumer<>(props);        consumer.subscribe(Collections.singletonList("price-updated"));
        return consumer;
    }

    @Test
    public void test() throws Exception {

        RestAssured.baseURI = "http://[::1]:8081/api/v1";

        try {
            KafkaConsumer<Integer, ProductPrice> consumer = createConsumer();
            String sku = prepareRandomSKUNumber();
            // Create Catalogue Item
            CatalogueItem catalogueItem = prepareCatalogueItem(sku);
            postCreateCatalogueItem(catalogueItem);
            // Update catalogue item
            double priceUpdatedTo = 99.99;            catalogueItem.setPrice(priceUpdatedTo);

            given()                .contentType("application/json")                .body(catalogueItem)                .pathParam("sku", sku)            .when()                .put("/{sku}")            .then()                .assertThat().spec(prepareResponseSpec(200));
            Unreliables.retryUntilTrue(45, TimeUnit.SECONDS, () -> {
                ConsumerRecords<Integer, ProductPrice> records = consumer.poll(Duration.ofMillis(100));

                if (records.isEmpty()) {
                    return false;
                }

                records.forEach(record -> {
                    log.info(String.format("==> Received %s ", record.value().getSkuNumber()));
                    if(record.value().getSkuNumber().equals(sku)) {
                        log.info(String.format("==> Product price received :: %s - %s", record.value().getSkuNumber(), record.value().getPrice()));
                        Assertions.assertEquals(record.value().getPrice(), priceUpdatedTo);                    }
                });

                return true;
            });
            consumer.unsubscribe();
        }
        catch(Exception e) {
            fail("Error occurred while testing price updated event", e);
        }
    }
}
Code highlighted depicts the sequence diagram.
Collecting Code Coverage Metrics
JaCoCo is a free code coverage library for Java which is widely used to capture the code coverage metrics during tests execution.JaCoCo can be configured with Maven & Gradle builds which generate the coverage reports. Below are the configurations that should be done:
<build>
  <plugins>
    <plugin>
      ....
      ....
    </plugin>
    <!-- Add JaCoCo plugin which is prepare agent and also generate report once test phase is completed-->
    <plugin>
      <groupId>org.jacoco</groupId>
      <artifactId>jacoco-maven-plugin</artifactId>
      <version>0.8.5</version>
      <executions>
        <execution>
          <goals>
            <goal>prepare-agent</goal>
          </goals>
        </execution>
        <execution>
          <id>report</id>
          <phase>test</phase>
          <goals>
            <goal>report</goal>
          </goals>
        </execution>
      </executions>
    </plugin>
  </plugins>
</build>plugins {
....
....
....
id 'jacoco'
}
/* Configure where the report should be generated*/
jacocoTestReport {
reports {
html.destination file("${buildDir}/jacocoHtml")
}
}For Maven, running mvn clean package will execute the tests and also generate the report. But for Gradle, we need to pass additional task along with build task to generate the report gradle clean build jacocoTestReport.
Below is the report that is generated from both Maven & Gradle and it matches irrespective of the build system used.
Note:
With Lombok used in the project, it will cause problems with coverage metrics. Jacoco can’t distinguish between Lombok’s generated code and the normal source code. As a result, the reported coverage rate drops unrealistically low.
To fix this, we need to create a file named lombok.config in project directory’s root and set the following flag as below. This adds the annotation lombok.@Generated to the relevant methods, classes and fields. Jacoco is aware of this annotation and will ignore that annotated code.
lombok.addLombokGeneratedAnnotation = trueBelow is the report generated without this configuration file added to the project. As observed, we see the coverage result drastically decreased.

Automatic Restart and Live Reloading in Development Mode
Quarkus comes with a built-in development mode. Run your application with:
$ mvn clean compile quarkus:dev$ gradle clean quarkusDevWe can then update the application sources, resources and configurations after running the above command. The changes are automatically reflected in our running application. This is great to do development spanning UI and database as you see changes reflected immediately.
quarkus:dev enables hot deployment with background compilation, which means that when you modify your Java files or your resource files and refresh your browser these changes will automatically take effect. This works too for resource files like the configuration property file. The act of refreshing the browser triggers a scan of the workspace, and if any changes are detected the Java files are compiled, and the application is redeployed, then your request is serviced by the redeployed application. If there are any issues with compilation or deployment an error page will let you know.
Hit CTRL+C to stop the application.
Packaging and Running Quarkus Application
Application generated from code.quarkus.io includes quarkus plugin with both Maven & Gradle. This plugin provides numerous options that are helpful during development mode and for packaging the application either in JVM or Native mode.
Native mode creates executables make Quarkus applications ideal for containers and serverless workloads. Ensure GraalVM >= v19.3.1 is installed and GRAALVM_HOME is configured.
Below are series of steps for packaging and running quarkus application with Maven & Gradle.
JVM Mode
$ mvn clean package

$ java -jar target/catalogue-crud-1.0.0-SNAPSHOT-runner.jar$ gradle clean quarkusBuild --uber-jar
$ java -jar build/catalogue-crud-1.0.0-SNAPSHOT-runner.jarNative Mode
Create a native executable by executing below command
$ mvn clean package -Pnative

$ ./target/catalogue-crud-1.0.0-SNAPSHOT-runner$ gradle clean buildNative
$ ./build/catalogue-crud-1.0.0-SNAPSHOT-runnerBelow is sample output of build creating native package and starting it up:

Native build are more memory & CPU intensive
GraalVM-based native build are more memory & CPU intensive than regular pure Java builds.
Below is htop stats when packaging native executable:
If native executable generation fails with below error message, then consider configuring native-image-xmx in application.yaml
$ mvn clean verify -Pnative

[ERROR] Caused by: java.lang.RuntimeException: Image generation failed.
Exit code was 137 which indicates an out of memory error.
Consider increasing the Xmx value for native image generation by
setting the "quarkus.native.native-image-xmx" propertyquarkus:
# configuration options that can affect how the native image is generated
native:
# The maximum Java heap to be used during the native image generation - 4 Gig
native-image-xmx: 4gBelow is the screencast of native image build and system resources being consumed when building the native image:
https://www.youtube.com/watch?v=T83w78eCLds
Supporting native in our application
There are quite some hurdles that we can come across if we build and run native package without going through Tips for Writing Native Applications documentation.
One such hurdle I came across is with below error message when testing the application after running native build:
com.fasterxml.jackson.databind.exc.InvalidDefinitionException:
No serializer found for class org.acme.jsonb.Person and no properties
discovered to create BeanSerializer (to avoid exception,
disable SerializationFeature.FAIL_ON_EMPTY_BEANS)
When building a native executable, GraalVM operates with a closed world assumption. It analyzes the call tree and removes all the classes/methods/fields that are not used directly.
The elements used via reflection are not part of the call tree so they are dead code eliminated (if not called directly in other cases). To include these elements in your native executable, you need to register them for reflection explicitly.
This is a very common case as JSON libraries typically use reflection to serialize the objects to JSON when preparing Response object in Controller classes.
Classes that need to be serialized should be registered with @RegisterForReflection annotation or should be registered in resources/reflection-config.json if they are part of third-party jar.
For purpose of this article, we have few classes registered via annotation and few registered in reflection-config.json file.
@Data
@NoArgsConstructor
@AllArgsConstructor
@RegisterForReflectionpublic class ResourceIdentity {

    @NonNull private Long id;
}

@Data
@AllArgsConstructor
@NoArgsConstructor
@RegisterForReflectionpublic class CatalogueItemList {

    @NonNull
    private List<CatalogueItem> data;
}[
{
"name" : "com.toomuch2learn.crud.catalogue.error.ErrorResponse",
"allDeclaredConstructors" : true,
"allPublicConstructors" : true,
"allDeclaredMethods" : true,
"allPublicMethods" : true,
"allDeclaredFields" : true,
"allPublicFields" : true
}, {
"name" : "com.toomuch2learn.crud.catalogue.error.Error",
"allDeclaredConstructors" : true,
"allPublicConstructors" : true,
"allDeclaredMethods" : true,
"allPublicMethods" : true,
"allDeclaredFields" : true,
"allPublicFields" : true
}
]The final order of business is to make the configuration file known to the native-image executable by adding the proper configuration to application.yaml
quarkus:

  # configuration options that can affect how the native image is generated
  native:

    # Additional arguments to pass to the build process
    additional-build-args: >
      -H:ResourceConfigurationFiles=resources-config.json,
      -H:ReflectionConfigurationFiles=reflection-config.json
Creating Docker Image
A pair of Dockerfiles for jvm and native mode are provided in src/main/docker when generated the code with code.quarkus.io.
Run the below command to build native executable and then create docker image with native executable file:
$ mvn clean package -Pnative

$ docker build -f src/main/docker/Dockerfile.native -t crud-catalog-quarkus .
Now lets start docker container with the image created. To access postgres database container that we already started for the development, we need to use --net=host to access it through the ip of host machine.
$ docker run -i --rm -p 8080:8080 --net=host crud-catalog-quarkusDeploying Quarkus Application to Kubernetes
Quarkus offers the ability to automatically generate Kubernetes resources provided by dekorate. Adding quarkus-container-image-docker extension will enabile Quarkus with the ability to create a container image and push it to a registry before deploying the application to the Kubernetes cluster.
For the scope of this article, we shall try to deploy quarkus application the vanilla way by following below series of steps:
Prerequisites
Setup Kubernetes Cluster
If Kubernetes is not installed and configured, Follow below steps to setup Kubernetes Cluster using MicroK8s on Ubuntu instance
$ sudo snap install microk8s --classic- Join user group
$ sudo usermod -a -G microk8s $USER
$ su - $USER- verify installation
$ microk8s.kubectl get nodes- Create alias for kubectl
$ sudo snap alias microk8s.kubectl kubectl- Create shortcut for kubectl
$ vi ~/.bashrc
$ alias k='microk8s.kubectl'- configure firewall to allow pod-to-pod and pod-to-internet communication:
$ sudo ufw allow in on cni0 && sudo ufw allow out on cni0
$ sudo ufw default allow routed- Write cluster config information to
$HOME/.kube/configfile
$ microk8s.kubectl config view --raw > $HOME/.kube/configSetup Skaffold
Google Container Tools Skaffold (https://skaffold.dev/) helps us to build and deploy the Quarkus application onto Kubernetes. It is easy and developer friendly way to build and deploy application to a local cluster like minikube/microk8s, without the need to push the image to external container registry.
If Skaffold is not installed and configured, Follow below steps to setup Skaffold
$ curl -Lo skaffold https://storage.googleapis.com/skaffold/releases/latest/skaffold-linux-amd64

$ chmod +x skaffold

$ sudo mv skaffold /usr/local/bin

$ skaffold version
v1.7.0
Deploying with Skafflod
Copy Dockerfile that is provisioned with Quarkus generated code artifact to root of the project
$ cp src/main/docker/Dockerfile.native DockerfileSkaffold needs Kubernetes Manifest files to be created before initializing and deploying our application.
Kubernetes manifests are used to create, modify and delete Kubernetes resources such as pods, deployments, services or ingresses. It is very common to define manifests in form of .yaml files and send them to the Kubernetes API Server via commands such as kubectl apply -f my-file.yaml or kubectl delete -f my-file.yaml.
Create file k8s-pod.yaml with below content to define the pod and containers to run within it.
apiVersion: v1
kind: Pod
metadata:
  name: crud-catalog-quarkus
spec:
  hostNetwork: true
  containers:
    - name: crud-catalog-quarkus
      image: narramadan/crud-catalog-quarkus
Observe hostNetwork: true. This is similar to using --net=host to access it through the ip of host machine.
Now, initialize Skaffold by running below command. This should prompt with options to choose the Dockerfile for the builder to build the image and generate skaffold.yaml file
$ skaffold initRun Skaffold to start the build and let the deployment complete
$ skaffold run

Generating tags...
 - narramadan/crud-catalog-quarkus -> WARN[0000] Unable to find git commit: running [git describe --tags --always]
 - stdout:
 - stderr: "fatal: not a git repository (or any of the parent directories): .git\n": exit status 128
narramadan/crud-catalog-quarkus:dirty
Checking cache...
 - narramadan/crud-catalog-quarkus: Found Remotely
Tags used in deployment:
 - narramadan/crud-catalog-quarkus -> narramadan/crud-catalog-quarkus:dirty@sha256:9f693b2c239e10bfa8ac875f3beffc4b8d9fd3ffad3a8db88a2290da02ff1ab6
Starting deploy...
 - pod/crud-catalog-quarkus created
Waiting for deployments to stabilize...
Deployments stabilized in 143.861675ms
You can also run [skaffold run --tail] to get the logs
Before using skaffold to deploy the application, run below command to watch the status
$ watch kubectl get pods

Every 2.0s: kubectl get pods                                            madan-Inspiron-7570: Sun Apr 12 20:03:11 2020

-- Upon starting deployment using dev or run
NAME                   READY   STATUS              RESTARTS   AGE
crud-catalog-quarkus   0/1     ContainerCreating   0          4s

-- When deployed
NAME                   READY   STATUS    RESTARTS   AGE
crud-catalog-quarkus   1/1     Running   0          2m25s

-- upon deleting
NAME                   READY   STATUS        RESTARTS   AGE
crud-catalog-quarkus   1/1     Terminating   0          20m
Testing APIs via Postman
API testing tool Postman is one of the most popular tools available. The ease of Accessibility, creating environments & collections to persist test cases which validate the response status & body and Automated testing with Newman which is a command-line collection runner for Postman.
Below are the tests we execute to verify the application that is started. Ensure to add header Content-Type: application/json which is needed for most of the tests.
⭐ Download and refer to complete Postman Collection for all the below tests.
Application Health
SmallRye Health extension exposes /health endpoint which will expose the status of the application.
Http Method: GET - Request Url: http://localhost:8080/health
Application Metrics
SmallRye Metrics extension exposes /metrics endpoint which will expose the default metrics and those custom metrics added to application.
Http Method: GET - Request Url: http://localhost:8080/metrics
Add Catalogue Item
Below are two postman requests which we will use to create Catalogue Items. One of the Catalogue item will be used to update it in the later tests.
Http Method: POST - Request Url: http://localhost:8080/api/v1/
{
	"sku": "CTLG-123-0001",
	"name": "The Avengers",
	"description": "Marvel's The Avengers Movie",
	"category": "Movies",
	"price": 0.0,
	"inventory": 0
}Get Catalogue Items
Get Catalogue Items that are persisted by the requests.
Http Method: GET - Request Url: http://localhost:8080/api/v1/
Update Catalogue Item
Update one of the Catalogue Item by its SKU number.
Http Method: PUT - Request Url: http://localhost:8080/api/v1/{sku}
{
	"sku": "CTLG-123-0001",
	"name": "The Avengers",
	"description": "Marvel's The Avengers Movie",
	"category": "Movies",
	"price": 95.99,
	"inventory": 10
}Get Catalogue Item by SKU
Get the updated Catalogue Item by its SKU. Verify if the fields that are updated compared to the add request is reflected in thus Get Request.
Http Method: GET - Request Url: http://localhost:8080/api/v1/{sku}
Delete Catalogue Item
Delete one of the Catalogue Item persisted earlier by its SKU.
Http Method: DELETE - Request Url: http://localhost:8080/api/v1/{sku}
Resource Not Found
Testing Resource not found exception by passing invalid SKU.
Validation Exception
Testing Validation exception by passing invalid request body.
Invalid Request
Testing Invalid Request when passing invalid data to price as below
Runtime Exception
When any Runtime Exception occurs, it is handled by returning back the below response. Detailed log of exception is also logged by the application for debugging purpose.
Verify logs in Graylog
Access Graylog UI http://127.0.0.1:9000 and login with credentials admin/admin. Logs will be published by quarkus-logging-gelf extension to GELF UDP input that is configured in Graylog. Logs that are written to console are also published to greylog simultaniously.
Verify tracing in Jaeger
Access Jaeger tracing UI http://127.0.0.1:16686 and select catalogue-crud service and click on find traces. All traces captured within the selected timeframe will be listed on the right with number of spans captured for each trace.
As we are capturing jdbc trace along with the default http trace enabled by OpenTracing, we can see observe more than one span for data-driven operations. Below is such trace for removing catalogue item request. Before removing, we validate if there exists valid entry in database for the provided sku. If exists, then we proceed to delete it and thus leading to query and update spans tagged to DELETE trace.
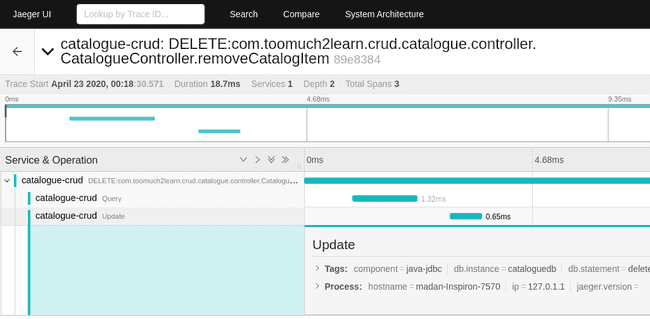
Gotchas
Native Executable failing with No serializer found for class error
Post building and running native executable file, we might encounter below error when accessing API which should return valid value as expected.
com.fasterxml.jackson.databind.exc.InvalidDefinitionException:
  No serializer found for class com.toomuch2learn.crud.catalogue.model.ResourceIdentity
    and no properties discovered to create BeanSerializer (to avoid exception, disable SerializationFeature.FAIL_ON_EMPTY_BEANS)
Follow steps provided here - https://quarkus.io/guides/writing-native-applications-tips#registering-for-reflection to register classes which needs reflection to serialize the objects to JSON.
Stopping services
Run the below commands sequentially to bring down the services that are started for testing the application
$ skaffold down$ docker stop pgdocker$ docker-compose -f docker-compose/kafka-docker-compose.yaml down$ docker-compose -f docker-compose/graylog-docker-compose.yaml down$ docker-compose -f docker-compose/jaeger-docker-compose.yaml downCleanup
As part of this exercise, lot of containers and networks gets created. These are useful when working on this application or needing these for different applications.
If you feel they are too many stopped and unused containers and needs cleanup, run the below commands to clean them up.
$ docker network prune$ docker rm $(docker ps -a -q)Conclusion
Implementing Microservice using Quarkus is like a breeze as most of the uplift is done by the framework and allowing us to focus on the business logic. With wide range of Extensions available, It is easy to Configure, boot and integrate a framework or technology into Quarkus application.
With support added to its core for generating native executables, Quarkus definitely provides an efficient solution for running Java applications withextremely short start-up time.
This itself is a a game changer, as we can setup and tear down applications and services in the blink of an eye, all whilst having a minimal footprint on the underlying systems.
This article is long and extensive for sure. But this gives us the understanding about the whole ecosystem of implementing, testing and deploying microservice that can bootup instantly and integrate with supporting tools to monitor, debug and scale. This is also the base for my future articles
- Performing Load Tests using Gatling / k6.io
- Building Quarkus Container Image using Jib
- Generate Kubernetes resources dekorate
- Deploying to Kubernetes, OpenShift, AWS, Azure, Google Cloud 😱 😞 😟 😦 😧 😴
And many more…
