Uploading files to MinIO Cloud Native Object Store from Quarkus RESTful API
Last modified: 11 May, 2020
Introduction
This article is extension of Creating RESTful API + Event-driven Microservice with Quarkus.
We shall go through steps on introducing new REST-endpoint for uploading Catalogue Item Image to MinIO which is a Cloud Native Object Storage service.
Article includes detailed steps on
- Overview on MinIO and provisioning MinIO Server/Client Docker containers
- MinIO server details configured in application.yaml
- Creating service class for MinIO Storage Service
- Defining RESTEasy endpoint for Uploading Image
- Integration tests
- Packaging Native Build
- Perform tests with Postman
Catalogue Management System
Apart from the RESTful APIs supported in Creating RESTful Microservice using Quarkus article, we will be introducing the below endpoint as part of this article.
| HTTP Method | API Name | Path | Response Status Code |
|---|---|---|---|
| POST | Upload Catalogue Item Image | /{sku}/image | 201 (Created) |
Technology stack used in this Article to build and test drive the microservice...
- GraalVM JDK 11
- Quarkus v1.3.2
- Eclipse MicroProfile
- SmallRye
- Hibernate v5.4.14
- JPA v2
- Apache Tika
- MinIO
- Docker
- Maven v3.6.3
- Gradle v6.1.1
- IntelliJ Idea v2019.3.2
Why MinIO?
In the world of containers, it will always be a challenge to mount volumes to scalable containers and additional overhead to manage authorized access for some specific group or to have role based permissions for performing read & write operations. It also involves backup activities which are tiresome and possibility of human errors.
Considering the challenges, Cloud services such as AWS S3, Azure Storage, Google Cloud Storage support for Unlimited Storage, Disaster Recovery and Security. These can be utilized when we are deploying our applications to their respective platform.
But when developing and testing locally, we might need to consider having storage operations performed to persistent volume or have them connected to remote services. Considering the drawbacks, it leads us to try out storage services which are compatible with online cloud storage services and can be provisioned locally for development and testing.
MinIO is high-performance, software-defined object storage service which is designed for performance, compatible with AWS S3 API and is 100% open-source. Applications that have been configured to talk to Amazon S3 can also be configured to talk to Minio, allowing Minio to be a viable alternative to S3 if you want more control over your object storage server. The service stores unstructured data such as photos, videos, log files, backups, and container/VM images, and can even provide a single object storage server that pools multiple drives spread across many servers.
It can be used locally, on-premie or private cloud with no compromise on stringent security requirements and delivers mission-critical availability across a diverse range of workloads.
For more details, refer to their features page.
Prerequisites
Basic knowledge of Java, Maven/Gradle, Quarkus, Docker is necessary for test driving this application.
Application referred in this article is built and tested on Ubuntu OS. If you are on windows and would like to make your hands dirty with Unix, then I would recommend going through Configure Development environment on Ubuntu 19.10 article which has detailed steps on setting up development environment on Ubuntu.
At the least, you should have below softwares and tools installed to try out the application:
Docker&Docker Compose
$ docker -v
Docker version 19.03.6, build 369ce74a3c
Booting up services mentioned in Quarkus RESTful + Event Driven Microservice Article
As this is extension on top of Creating RESTful Microservice using Quarkus, It is advisable to go through Creating RESTful Microservice using Quarkus article and configure all softwares and tools as mentioned in Prerequisites section.
Microservice is built using Quarkus to expose APIs and also support handling/publishing events to Kafka. This is integrated with Graylog for centralized logging and Jaeger for distributed tracing.
Below are the Restful APIs that are exposed by Catalogue Management System microservice application.
| HTTP Method | API Name | Path | Response Status Code |
|---|---|---|---|
| POST | Create Catalogue Item | / | 201 (Created) |
| GET | Get Catalogue Items | / | 200 (Ok) |
| GET | Get Catalogue Item | /{sku} | 200 (Ok) |
| PUT | Update Catalogue Item | /{sku} | 200 (Ok) |
| DELETE | Delete Catalogue Item | /{sku} | 204 (No Content) |
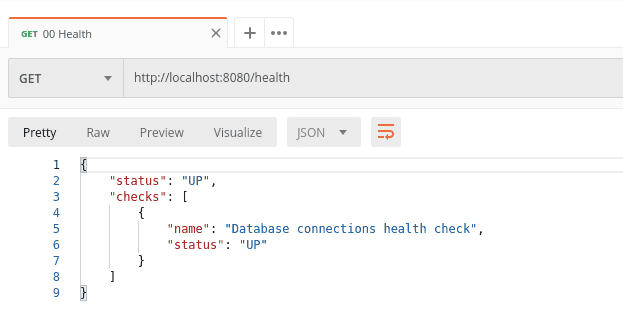
Follow the series of steps mentioned in Prerequisites section to boot up the database and supporting containers. To ensure microservice is up and running, access http://localhost:8080/health in browser and should show status as UP.
Start MinIO
MinIO provides Server & Client artifacts in the form of native executable or docker images. We can bootstrap MinIO Server using minio/minio docker image and use minio/mc docker image to bootstrap the client which we can connect to the server instance.
MinIO Server
Execute the below commands to pull and run the container:
$ docker pull minio/minio

# Run in detached mode with key/secret passed
$ docker run -p 9090:9000 --name minio -e MINIO_ACCESS_KEY=minioadmin -e MINIO_SECRET_KEY=minioadmin -d minio/minio server /data
As Observed,
minioadminare passed as environment variables forMINIO_ACCESS_KEY&MINIO_SECRET_KEY. These will be used as credentials to login to MinIO UI and also when accessing MinIO services through MinIO Client SDKs.9090port is mapped to MinIO default exposed post9000to avoid clashes with other provisioned services which are already using9000.- Run command
docker logs minioto verify startup logs captured as part of server bootup. - MinIO UI is accessible from
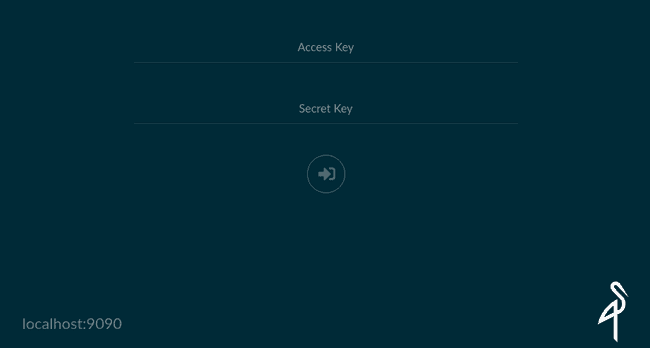
http://127.0.0.1:9090and login with the credentials passed to the container.
MinIO Client
MinIO Client (mc) provides a modern alternative to UNIX commands like ls, cat, cp, mirror, diff, find etc. It supports file systems and Amazon S3 compatible cloud storage service signatures.
Execute the below commands to pull and hop on to shell to access mc:
$ docker pull minio/mc

$ docker run -it --entrypoint=/bin/sh minio/mc
Once connected to containers shell, we can configure the client to connect to provisioned server and perform various operations. Below are few for reference:
$ mc config host add minio http://<CONTAINER_PORT>:9000 minioadmin minioadmin --api S3v4

<CONTAINER_PORT> - This can be identified by pulling out server logs by running - docker logs minio (Ex: 172.17.0.3)$ mc admin trace -v -a --json minio$ mc ls minio
[2020-05-09 05:59:46 UTC] 0B catalogue-item-images/
[2020-05-09 02:54:29 UTC] 0B test/
$ mc ls minio/test
[2020-05-09 02:54:29 UTC] 18KiB postman_health.png$ mc policy -r set-json policy.json minio/catalogue-item-images
- policy.json
{
"Version":"2012-10-17",
"Statement":[
{
"Sid":"PublicRead",
"Effect":"Allow",
"Principal": "*",
"Action":["s3:GetObject"],
"Resource":["arn:aws:s3:::catalogue-item-images/*"]
}
]
}$ mc policy get-json minio/catalogue-item-imagesAnd many more commands to list, make, remove, copy, remove, set & get policy, perform admin actions, apply config…
ls        list buckets and objects
mb        make a bucket
rb        remove a bucket
cat       display object contents
head      display first 'n' lines of an object
pipe      stream STDIN to an object
share     generate URL for temporary access to an object
cp        copy objects
mirror    synchronize objects to a remote site
find      search for objects
sql       run sql queries on objects
stat      stat contents of objects
lock      set and get object lock configuration
retention set object retention for objects with a given prefix
legalhold set object legal hold for objects
diff      list differences in object name, size, and date between buckets
rm        remove objects
event     manage object notifications
watch     watch for object events
policy    manage anonymous access to objects
admin     manage MinIO servers
session   manage saved sessions for cp command
config    manage mc configuration file
update    check for a new software update
version   print version info
MinIO SDK
MinIO provides Client SDK for Java, Javascript, Python, Golang, .Net & Haskell providing simple APIs to access any Amazon S3 compatible object storage server.
MinIO Java Client SDK needs Java 1.8 as minimum requirement and can be added as dependency to maven/gradle. Below is sample from minio documentation to initialize MinIO Client and perform operations.
// Create a minioClient with the MinIO Server name, Port, Access key and Secret key.
MinioClient minioClient = new MinioClient("https://play.min.io", "Q3AM3UQ867SPQQA43P2F", "zuf+tfteSlswRu7BJ86wekitnifILbZam1KYY3TG");
// Check if the bucket already exists.
boolean isExist = minioClient.bucketExists("asiatrip");if(isExist) {
  System.out.println("Bucket already exists.");
} else {
  // Make a new bucket called asiatrip to hold a zip file of photos.
  minioClient.makeBucket("asiatrip");}

// Upload the zip file to the bucket with putObject
minioClient.putObject("asiatrip","asiaphotos.zip", "/home/user/Photos/asiaphotos.zip", null);System.out.println("/home/user/Photos/asiaphotos.zip is successfully uploaded as asiaphotos.zip to `asiatrip` bucket.");
Below are few operations that can be performed with MinioClient:
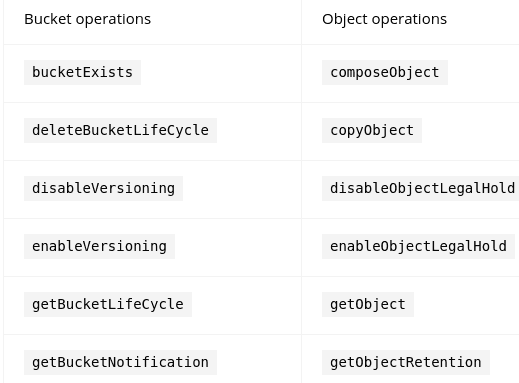
For complete list of operations, refer to the Java Client API Reference page.
Adding dependencies needed to support file upload
Below are couple of dependencies that are included for introducing file upload feature on top of existing application.
<!-- RESTEasy Multipart provider for file upload capability--><dependency>
  <groupId>org.jboss.resteasy</groupId>
  <artifactId>resteasy-multipart-provider</artifactId>
  <exclusions>
    <exclusion>
      <groupId>org.jboss.spec.javax.annotation</groupId>
      <artifactId>jboss-annotations-api_1.3_spec</artifactId>
    </exclusion>
    <exclusion>
      <groupId>javax.activation</groupId>
      <artifactId>activation</artifactId>
    </exclusion>
  </exclusions>
</dependency>

<!-- To validated if uploaded file is actually of image type --><dependency>
  <groupId>org.apache.tika</groupId>
  <artifactId>tika-core</artifactId>
  <version>1.24.1</version>
</dependency>

<!-- MinIO Client SK --><dependency>
  <groupId>io.minio</groupId>
  <artifactId>minio</artifactId>
  <version>7.0.2</version>
</dependency>

<!-- Quarkus Template engine to render minio policy files --><dependency>
  <groupId>io.quarkus</groupId>
  <artifactId>quarkus-qute</artifactId>
</dependency>implementation('org.jboss.resteasy:resteasy-multipart-provider') {
exclude group: 'org.jboss.spec.javax.annotation', module: 'jboss-annotations-api_1.3_spec'
exclude group: 'javax.activation', module: 'activation'
}
implementation 'org.apache.tika:tika-core:1.24.1'
implementation 'io.minio:minio:7.0.2'
implementation 'io.quarkus:quarkus-qute'Upon application startup with the above dependencies, their might be failure due to com.ctc.wstx.stax.WstxInputFactory not found error. There is a defect https://github.com/quarkusio/quarkus/issues/7359 reported and still open as of drafting this article. To fix this we need to add the below dependency.
...
...
<!-- To fix https://github.com/quarkusio/quarkus/issues/7359 -->
<dependency>
  <groupId>com.fasterxml.woodstox</groupId>
  <artifactId>woodstox-core</artifactId>
  <version>6.2.0</version>
</dependency>
...
......
...
implementation 'com.fasterxml.woodstox:woodstox-core:6.2.0'
...
...Create Image Upload Controller
Controller class CatalogueItemImageUploadController.java is introduced to handle image upload for specific catalogue item. POST operation is handled by accepting the provided path param and the binary content received in the form of InputStream.
@POST
@Path(CatalogueControllerAPIPaths.UPLOAD_IMAGE)
public Response uploadImage(@PathParam(value = "sku") String skuNumber, InputStream inputStream)  throws ResourceNotFoundException, Exception {
  // Validate skuNumber by Getting catalogue item by sku. If not available, resource not found will be thrown.
  catalogueCrudService.getCatalogueItem(skuNumber);
  // Create temp file from the uploaded image input stream
  File tempFile = createTempFile(skuNumber, inputStream);
  // Validate if the uploaded file is of type image. Else throw error
  Tika tika = new Tika();  String mimeType = tika.detect(tempFile);  if (!mimeType.contains("image")) {    throw new ImageUploadException(ErrorCodes.ERR_IMAGE_UPLOAD_INVALID_FORMAT, String.format("File uploaded for SKU:%s is not valid image format", skuNumber));  }
  // Upload the file to storage service
  storageService.uploadCatalogueImage(skuNumber, mimeType, tempFile);
  return Response.status(Response.Status.CREATED).build();
}

private File createTempFile(String skuNumber, InputStream inputStream) throws ImageUploadException {  try {
    File tempFile = File.createTempFile(skuNumber, ".tmp");
    tempFile.deleteOnExit();

    FileOutputStream out = new FileOutputStream(tempFile);
    IOUtils.copy(inputStream, out);

    return tempFile;
  }
  catch(Exception e) {
    throw new ImageUploadException(String.format("Error occurred while creating temp file for uploaded image : %s", skuNumber), e);
  }
}
Below is the overview of the implementation as per highlighted code:
- Verify if the provided
skuis valid by callingcatalogueCrudService.getCatalogueItem(skuNumber).ResourceNotFoundExceptionwill be thrown If catalogue item doesn’t exist. - Create
tempfile from receivedInputStream. - Validate if uploaded file is of valid image format using
Apache Tika. - Call
uploadCatalogueImageservice method to upload image to storage service.
Validate if file uploaded is valid image format
To ensure if uploaded file is of valid image format, file content validation is done with Apache Tika.
Apache Tika toolkit detects and extracts metadata and text from over a thousand different file types (such as PPT, XLS, and PDF). All of these file types can be parsed through a single interface, making Tika useful for search engine indexing, content analysis, translation, and much more.
Tika can detect and return the mime type of the file which can be used to verify if it is of type image or not. ImageUploadException is thrown if uploaded file is not of type image.
// Validate if the uploaded file is of type image. Else throw error
Tika tika = new Tika();
String mimeType = tika.detect(tempFile);if (!mimeType.contains("image")) {  throw new ImageUploadException(ErrorCodes.ERR_IMAGE_UPLOAD_INVALID_FORMAT, String.format("File uploaded for SKU:%s is not valid image format", skuNumber));
}
mime-type detected and returned by Tika will be used to set the content-type when putting the object to minio.
Handle file upload with MinIO Service class
MinIO’s API is compatible with Amazon S3 API and it features around the features and functionalities that are provided by AWS S3.
Configure MinIO server details
Before we start implementing the service, let’s configure minio server details along with credentials and bucket to hold catalogue item images in `configuration file.
minio:
  use-ssl: false
  host: localhost
  port: 9090
  access-key: minioadmin
  secret-key: minioadmin
  catalogue-item-bucket: catalogue-item-images
Inject these configuration properties to MinIOConfiguration.java upon startup.
package com.toomuch2learn.crud.catalogue.config;

import io.quarkus.arc.config.ConfigProperties;
import lombok.Data;
import lombok.NoArgsConstructor;

@Data
@NoArgsConstructor
@ConfigProperties(prefix = "minio")
public class MinIOConfiguration {

  private boolean useSsl;
  private String host;
  private int port;
  private String accessKey;
  private String secretKey;
  private String catalogueItemBucket;
}
Set bucket policy
Access to objects that are persisted to the bucket is done by setting policy rules. Policy schema is same as AWS S3 policy schema definition and thus making minio compatible with AWS S3.
Catalogue Item image that is uploaded has to be accessed in Frontend application. The only rule that needs to be applied is grant access anonymously to every object under the bucket. This make the object accessible if you have the complete url to access it.
To try out Quarkus Qute` which is template engine that is designed specifically to meet the Quarkus needs. The usage of reflection is minimized to reduce the size of native images. The API combines both the imperative and the non-blocking reactive style of coding.
Below is the policy template that is created in resources/templates folder with only one value expression used which will be rendered with the bucket name that is configured.
{
  "Version":"2012-10-17",
  "Statement":[
    {
      "Sid":"PublicRead",
      "Effect":"Allow",
      "Principal": "*",
      "Action":["s3:GetObject"],
      "Resource":["arn:aws:s3:::{catalogueItemBucket}/*"]    }
  ]
}
Implementing Service class
With MinIOConfiguration & Qute Engine injected to the service class, we can initialize MinioClient object and start uploading the image to minio.
Below are series of implementations steps for the highlighted lines in the code block:
- Ensure the bucket to which the file has to be uploaded exists. If not, then create it.
- Define policy that has to be applied to the bucket.
- Set content size and type of the file to
PutObjectOptions. - Upload file by calling
minioClient.putObject.
@ApplicationScoped
public class MinIOStorageService implements IStorageService {

  private Logger log = LoggerFactory.getLogger(MalformedInputException.class);

  @Inject
  Engine templateEngine;
  @Inject
  MinIOConfiguration minIOConfiguration;
  private MinioClient minioClient;
  private Template policyTemplate;

  void initializeMinIOClient() throws ImageUploadException, RuntimeException {
    try {
        // Create instance of minio client with configured service details
        minioClient =            new MinioClient(                minIOConfiguration.getHost(),                minIOConfiguration.getPort(),                minIOConfiguration.getAccessKey(),                minIOConfiguration.getSecretKey(),                minIOConfiguration.isUseSsl());
        // Check and create if bucket is available to store catalogue images
        createBucketIfNotExists();
    }
    catch (InvalidEndpointException | InvalidPortException e) {
        throw new RuntimeException(String.format("MinIO Service is not initialized due to invalid Host:%s or PORT:%s", "", ""));
    }
    catch (ImageUploadException e) {
        throw e;
    }
    catch (Exception e) {
        throw new RuntimeException("Error occurred while initializing MinIO Service", e);
    }
  }

  private void createBucketIfNotExists() throws ImageUploadException{
    try {
        // Check if the bucket already exists.        boolean isExist = minioClient.bucketExists(minIOConfiguration.getCatalogueItemBucket());        if(!isExist) {          // Prepare Anonymous readonly Policy to fetch objects from bucket without signed url          policyTemplate = templateEngine.getTemplate("policy-bucket-catalogueItemImage.json");          String policy              = policyTemplate                  .data("catalogueItemBucket", minIOConfiguration.getCatalogueItemBucket())                  .render();          minioClient.makeBucket(minIOConfiguration.getCatalogueItemBucket());          minioClient.setBucketPolicy(minIOConfiguration.getCatalogueItemBucket(), policy);        }
    }
    catch(Exception e) {
        throw new ImageUploadException("Error occurred while creating bucket to store catalogue item images", e);
    }
  }

  /**
    * Method to upload the image to minio object store
    * @param skuNumber
    * @param contentType
    * @param image
    * @throws ImageUploadException
    */
  public void uploadCatalogueImage(String skuNumber, String contentType, File image) throws ImageUploadException {
    try {

      if(minioClient == null)          initializeMinIOClient();
      // Prepare options with size and content type
      PutObjectOptions options = new PutObjectOptions(image.length(),-1);      options.setContentType(contentType);
      // Put the object to bucket
      minioClient.putObject(          minIOConfiguration.getCatalogueItemBucket(),          skuNumber,          new FileInputStream(image),          options);    }
    catch (Exception e) {
        throw new ImageUploadException(String.format("Error occurred while uploading catalogue item image for SKU: %s", skuNumber), e);
    }
  }
}
Handling Exceptions
ImageUploadException custom exception is added to wrap exceptions that are thrown during different phases of file upload implementation. Two new error codes are introduced when creating instance of this custom exception.
  ...
  ...
  ...
  /**
    * Error code for Storage Exception
    */
  public static final int ERR_IMAGE_UPLOAD_FAILED = 1050;

  /**
    * Error code for Invalid image format
    */
public static final int ERR_IMAGE_UPLOAD_INVALID_FORMAT = 1060;public class ImageUploadException extends Exception{
private static final long serialVersionUID = 1L;
private int code;
public ImageUploadException(String message, Throwable e){
super(message,e);
}
public ImageUploadException(int code, String message){
super(message);
this.code = code;
}
public ImageUploadException(int code, String message, Throwable e){
super(message, e);
this.code = code;
}
public int getCode() {
return code;
}
}ExceptionMapper is created to handle ImageUploadException and return back appropriate http response code and message when handling file upload content validation or exception occurred when handling minio operations.
@Provider
public class ImageUploadExceptionMapper implements ExceptionMapper<ImageUploadException> {

  private Logger log = LoggerFactory.getLogger(ImageUploadExceptionMapper.class);

  @Override
  public Response toResponse(ImageUploadException e) {
      log.error(String.format("Storage exception occurred: %s ", e.getMessage()), e);

      ErrorResponse error = new ErrorResponse();

      if(e.getCode() == ErrorCodes.ERR_IMAGE_UPLOAD_INVALID_FORMAT) {
          error.getErrors().add(            new Error(              ErrorCodes.ERR_IMAGE_UPLOAD_INVALID_FORMAT,              "Uploaded image is not of a valid format",              e.getMessage()            )          );          return Response.status(Response.Status.BAD_REQUEST).entity(error).build();      }
      else {
          error.getErrors().add(            new Error(              ErrorCodes.ERR_IMAGE_UPLOAD_FAILED,              "Error occurred while uploading image",              e.getMessage()            )          );          return Response.status(Response.Status.INTERNAL_SERVER_ERROR).entity(error).build();      }
  }
}
Testing with Quarkus
Integration tests for Quarkus are implemented with Junit5, RESTAssured and Test Containers. Refer to Testing section in Creating RESTful Microservice using Quarkus article which includes details on setting up dependencies and testcontainer configurations.
Provisioning Minio Test Container
TestContainers does not have supporting class for MinIO, Instead provides support for provisioning any docker image with GenericContainer class which we will be using for testing Image Upload endpoint.
Custom configuration class MinIOTestResource is created by extending QuarkusTestResourceLifecycleManager and implementing start and stop lifecycle methods for defined GenericContainer.
public class MinIOTestResource implements QuarkusTestResourceLifecycleManager {

  public GenericContainer minio;

  private final String ACCESS_SECRET_KEY = "minioadmin";
  private final int EXPOSED_PORT = 9000;

  @Override
  public Map<String, String> start() {
    minio
      = new GenericContainer<>("minio/minio")        .withExposedPorts(EXPOSED_PORT, EXPOSED_PORT)
        .withEnv("MINIO_ACCESS_KEY", ACCESS_SECRET_KEY)
        .withEnv("MINIO_SECRET_KEY", ACCESS_SECRET_KEY)
        .withCommand("server", "/data")
        .waitingFor(Wait.forHttp("/minio/health/ready"))        .withLogConsumer(new Slf4jLogConsumer(LoggerFactory.getLogger(MinIOTestResource.class)));
    minio.start();

    // Map environment variables with the started container's exposed port
    Map<String, String> map = new HashMap<>();
    map.put("minio.port", Integer.toString(minio.getFirstMappedPort()));    map.put("minio.access-key", ACCESS_SECRET_KEY);
    map.put("minio.secret-key", ACCESS_SECRET_KEY);

    return map;
  }

  @Override
  public void stop() {
      minio.stop();
  }
}
Below are some insights on highlighted code:
waitingForhttp option is added to ensure container is provisioned and ready to accept requests before starting up test executionwithLogConsumeroption is added for debugging purpose to capture the container logs to the test console.- Random Port will be created by
TestContainerwhich will be mapped to accept request. This mapped port can be retrieved withminio.getFirstMappedPort(). Configuration param that is mapped with port9090will be replaced with the mapped port.
Testing Image Upload REST endpoint
Test class RestAssuredCatalogueImageUploadTest is defined to handle all tests against image upload endpoint. It imports classes from JUnit5, REST-assured and Hamcrest to setup, access and validate image upload API endpoint.
Below are the tests that are included as part of the Test class:
- Upload catalogue item image for valid SKU
- Upload catalogue item image for invalid SKU
- Upload file which is not a valid image format
With the common reusable code separated into BaseTest, implementing test methods will be easy by following the Given\When\Then syntax.
As all the tests are performed on the single API endpoints, they all share the same API Base URI. REST-assured provides a convenient way to configure this base uri to be used by all the tests.
@BeforeEach
public void setURL() {
    RestAssured.baseURI = "http://[::1]:8081/api/v1";
}Note: Rather than defining the baseURI before each test, we can configure static block and assign the value just once. But this is not being honored and unclear why. To focus on the overall implementation, this is parked aside for further analysis.
static {
  RestAssured.baseURI = "http://localhost:8080/api/v1";
}
Below is implementation of Upload catalogue item image for valid SKU:
Multiple operations are handled for image upload request. Create instance of CatalogueItem and send request to create it. Access get request passing sku and validating if we are receiving 200 Status and finally post request to image upload endpoint with input stream of image file available in classpath.
@Test
@DisplayName("Test upload Catalogue Item image")
public void test_uploadCatalogueItemImage() {
  try {
    String skuNumber = prepareRandomSKUNumber();

    // Create Catalogue Item    postCreateCatalogueItem(prepareCatalogueItem(skuNumber))
    .then()
        .assertThat().spec(prepareResponseSpec(201))
    .and()
        .assertThat().body("id", greaterThan(0));

    // Get Catalogue Item    given()
        .pathParam("sku", skuNumber)
    .when()
        .get("/{sku}")
    .then()
        .assertThat().spec(prepareResponseSpec(200));

    // Load file from resource to input stream    InputStream image = getClass().getClassLoader().getResourceAsStream("crud.png");

    // Post image upload for specific SKU    given()
        .contentType("application/octet-stream")
        .body(image)
        .pathParam("sku", skuNumber)
    .when()
        .post("/{sku}/image")
    .then()
        .assertThat().spec(prepareResponseSpec(Response.Status.CREATED.getStatusCode()));
  }
  catch(Exception e) {
      fail("Error occurred while uploading catalogue item image endpoint", e);
  }
}
Going through each test method would make this article even lengthy than what it is now. To cut short, Refer to source code for complete implementation of each test method.
Packaging and Running Quarkus Application
Application generated from code.quarkus.io includes quarkus plugin with both Maven & Gradle. This plugin provides numerous options that are helpful during development mode and for packaging the application either in JVM or Native mode.
Native mode creates executables make Quarkus applications ideal for containers and serverless workloads. Ensure GraalVM >= v19.3.1 is installed and GRAALVM_HOME is configured.
Below are series of steps for packaging and running quarkus application with Maven & Gradle.
JVM Mode
$ mvn clean package

$ java -jar target/catalogue-crud-1.0.0-SNAPSHOT-runner.jar$ gradle clean quarkusBuild --uber-jar
$ java -jar build/catalogue-crud-1.0.0-SNAPSHOT-runner.jarNative Mode
Create a native executable by executing below command
$ mvn clean package -Pnative

$ ./target/catalogue-crud-1.0.0-SNAPSHOT-runner$ gradle clean buildNative
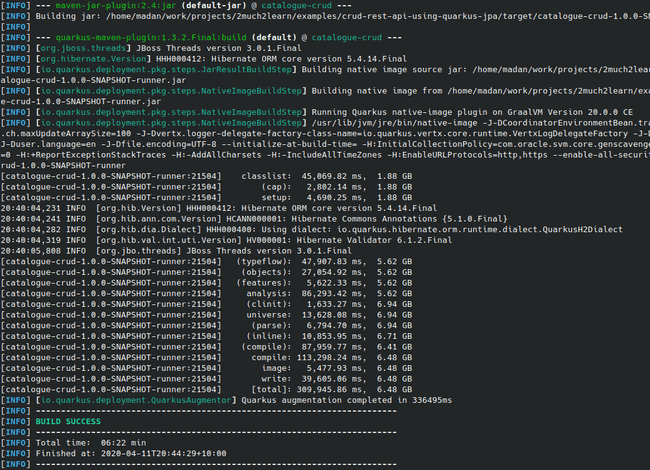
$ ./build/catalogue-crud-1.0.0-SNAPSHOT-runnerBelow is sample output of build creating native package and starting it up:

Native build are more memory & CPU intensive
GraalVM-based native build are more memory & CPU intensive than regular pure Java builds.
Below is htop stats when packaging native executable:
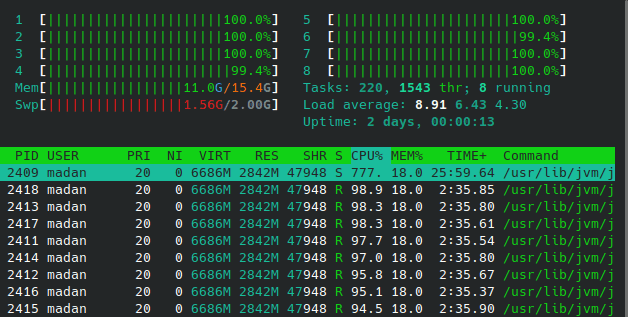
If native executable generation fails with below error message, then consider configuring native-image-xmx in application.yaml
$ mvn clean verify -Pnative

[ERROR] Caused by: java.lang.RuntimeException: Image generation failed.
Exit code was 137 which indicates an out of memory error.
Consider increasing the Xmx value for native image generation by
setting the "quarkus.native.native-image-xmx" propertyquarkus:
# configuration options that can affect how the native image is generated
native:
# The maximum Java heap to be used during the native image generation - 4 Gig
native-image-xmx: 4gSupporting native in our application
There are quite some hurdles that we can come across if we build and run native package without going through Tips for Writing Native Applications documentation.
One such hurdle I came across is with below error message when testing the application after running native build:
Caused by: org.simpleframework.xml.core.PersistenceException:
  Constructor not matched for class io.minio.messages.LocationConstraint
        at io.minio.Xml.unmarshal(Xml.java:55)
        at io.minio.MinioClient.updateRegionCache(MinioClient.java:1257)
        at io.minio.MinioClient.getRegion(MinioClient.java:1279)
When building a native executable, GraalVM operates with a closed world assumption. It analyzes the call tree and removes all the classes/methods/fields that are not used directly.
The elements used via reflection are not part of the call tree so they are dead code eliminated (if not called directly in other cases). To include these elements in your native executable, you need to register them for reflection explicitly.
Classes that need to be serialized should be registered with @RegisterForReflection annotation or should be registered in resources/reflection-config.json if they are part of third-party jar.
MinIO Java Client SDK uses org.simpleframework.xml library to prepare xml for request and parse xml that is received in response. This library heavily relies on reflection which is not supported with native build. It took multiple iterations to build and test native build to identify the classes that should be registered in reflection-config.json as these are part of third-part jar
Below is the final set of classes that are registered to successfully test image upload to REST endpoint and put the object in MinIO Server with native build.
[
  {
    "name" : "com.toomuch2learn.crud.catalogue.error.ErrorResponse",
    "allDeclaredConstructors" : true,
    "allPublicConstructors" : true,
    "allDeclaredMethods" : true,
    "allPublicMethods" : true,
    "allDeclaredFields" : true,
    "allPublicFields" : true
  }, {
    "name" : "com.toomuch2learn.crud.catalogue.error.Error",
    "allDeclaredConstructors" : true,
    "allPublicConstructors" : true,
    "allDeclaredMethods" : true,
    "allPublicMethods" : true,
    "allDeclaredFields" : true,
    "allPublicFields" : true
  }, {
    "name" : "io.minio.messages.LocationConstraint",
    "allDeclaredConstructors" : true,
    "allPublicConstructors" : true,
    "allDeclaredMethods" : true,
    "allPublicMethods" : true,
    "allDeclaredFields" : true,
    "allPublicFields" : true
  }, {
    "name" : "org.simpleframework.xml.core.TextLabel",
    "allDeclaredConstructors" : true,
    "allPublicConstructors" : true,
    "allDeclaredMethods" : true,
    "allPublicMethods" : true,
    "allDeclaredFields" : true,
    "allPublicFields" : true
  }, {
    "name": "io.minio.messages.InitiateMultipartUploadResult",
    "allDeclaredConstructors" : true,
    "allPublicConstructors" : true,
    "allDeclaredMethods" : true,
    "allPublicMethods" : true,
    "allDeclaredFields" : true,
    "allPublicFields" : true
  }, {
    "name": "org.simpleframework.xml.core.ElementLabel",
    "allDeclaredConstructors" : true,
    "allPublicConstructors" : true,
    "allDeclaredMethods" : true,
    "allPublicMethods" : true,
    "allDeclaredFields" : true,
    "allPublicFields" : true
  }, {
    "name": "org.simpleframework.xml.core.ElementListLabel",
    "allDeclaredConstructors" : true,
    "allPublicConstructors" : true,
    "allDeclaredMethods" : true,
    "allPublicMethods" : true,
    "allDeclaredFields" : true,
    "allPublicFields" : true
  }, {
    "name": "io.minio.messages.ErrorResponse",
    "allDeclaredConstructors" : true,
    "allPublicConstructors" : true,
    "allDeclaredMethods" : true,
    "allPublicMethods" : true,
    "allDeclaredFields" : true,
    "allPublicFields" : true
  }, {
    "name": "io.minio.ErrorCode$ErrorCodeConverter",
    "allDeclaredConstructors" : true,
    "allPublicConstructors" : true,
    "allDeclaredMethods" : true,
    "allPublicMethods" : true,
    "allDeclaredFields" : true,
    "allPublicFields" : true
  }, {
    "name": "io.minio.messages.CompleteMultipartUpload",
    "allDeclaredConstructors" : true,
    "allPublicConstructors" : true,
    "allDeclaredMethods" : true,
    "allPublicMethods" : true,
    "allDeclaredFields" : true,
    "allPublicFields" : true
  }, {
    "name": "io.minio.messages.Part",
    "allDeclaredConstructors" : true,
    "allPublicConstructors" : true,
    "allDeclaredMethods" : true,
    "allPublicMethods" : true,
    "allDeclaredFields" : true,
    "allPublicFields" : true
  }
]
This list is extensive for sure and can be replaced by implementing Quarkus Extension and configuring classes registered in reflection-config.json in Quarkus Extension. Checkout MinIO Quarkus Extension section for more details.
The final order of business is to make the configuration file known to the native-image executable by adding the proper configuration to application.yaml
quarkus:

  # configuration options that can affect how the native image is generated
  native:

    # Additional arguments to pass to the build process
    additional-build-args: >
      -H:ResourceConfigurationFiles=resources-config.json,
      -H:ReflectionConfigurationFiles=reflection-config.json
Testing Image Upload API via Postman
API testing tool Postman is one of the most popular tools available. The ease of Accessibility, creating environments & collections to persist test cases which validate the response status & body and Automated testing with Newman which is a command-line collection runner for Postman.
Below are the tests we execute to verify the application that is started. Ensure to add header Content-Type: application/json which is needed for most of the tests.
⭐ Download and refer to complete Postman Collection for all the below tests.
Application Health
SmallRye Health extension exposes /health endpoint which will expose the status of the application.
Http Method: GET - Request Url: http://localhost:8080/health
Add Catalogue Item
Below is the postman requests which we will use to create Catalogue Items. One of the Catalogue item will be used to update it in the later tests.
Http Method: POST - Request Url: http://localhost:8080/api/v1/
{
	"sku": "CTLG-123-0001",
	"name": "The Avengers",
	"description": "Marvel's The Avengers Movie",
	"category": "Movies",
	"price": 0.0,
	"inventory": 0
}Upload Catalogue Item Image
Upload image to the created Catalogue Item by passing the SKU number used to create it
Http Method: POST - Request Url: http://localhost:8080/api/v1/{sku}/image
Note: binary option to be choosed with valid image selected as shown below
If request is successful with HTTP 201 status code, access the uploaded file with minio url http://localhost:9090/catalogue-item-images/{SKU}. This is possible because of anonymous policy applied on the bucket.
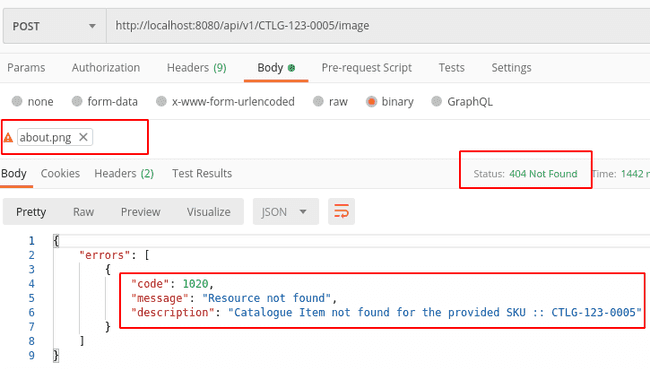
Upload Catalogue Item Image with invalid SKU
Upload image for invalid SKU number
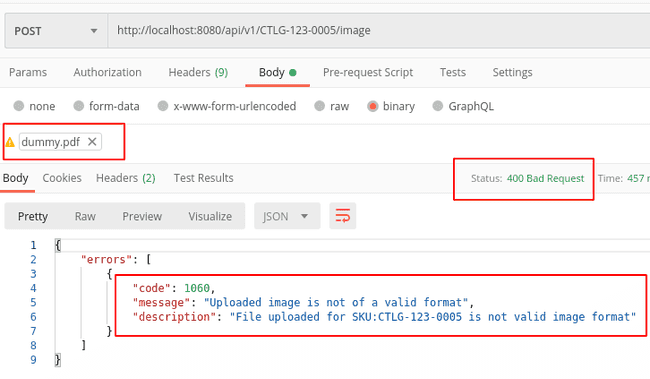
Uploading Unsupported Image Format
Upload image for valid SKU number with a pdf file
Stopping services
Follow commands sequentially listed in Stopping Services section from Creating RESTful API + Event-driven Microservice with Quarkus article along with the below command to stop minio. Listing them here for reference.
$ docker stop pgdocker$ docker-compose -f docker-compose/kafka-docker-compose.yaml down$ docker-compose -f docker-compose/graylog-docker-compose.yaml down$ docker-compose -f docker-compose/jaeger-docker-compose.yaml down$ docker stop minioCleanup
As part of this exercise, lot of containers and networks gets created. These are useful when working on this application or needing these for different applications.
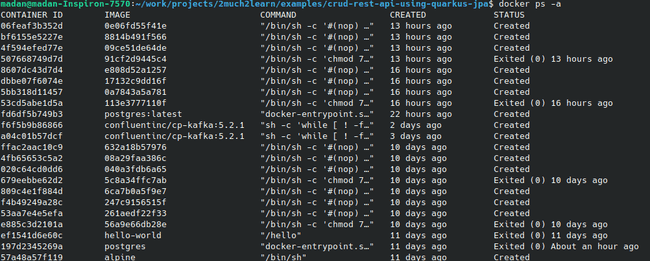
If you feel they are too many stopped and unused containers and needs cleanup, run the below commands to clean them up.
$ docker network prune$ docker rm $(docker ps -a -q)MinIO Quarkus Extension
To get Native build running with MinIO integration, we had to configure lot many classes in reflection-config.json. It will be real hard to configure all of these in every application we plan to use MinIO. This can be eliminated with Quarkus Extension.
Quarkus Extension is a module that can run on top of a Quarkus application. It is a Maven multi-module project composed of two modules. The first is a runtime module where we implement requirements. The second is a deployment module for processing configuration and generating the runtime code.
Below is the maven command to create a new quarkus extension.
$ mvn io.quarkus:quarkus-maven-plugin:1.4.2.Final:create-extension -N \
    -DgroupId=org.toomuch2learn \
    -DartifactId=quarkus-minio \
    -Dversion=1.0-SNAPSHOT \
    -Dquarkus.nameBase="Quarkus MinIO Extension"
This should bootstrap the Quarkus extension, we would see tww modules created deployment and runtime with each holding their individual pom.xml and also one at the root level referring to both of these as below:
<?xml version="1.0" encoding="UTF-8"?>
<project xmlns="http://maven.apache.org/POM/4.0.0"
         xmlns:xsi="http://www.w3.org/2001/XMLSchema-instance"
         xsi:schemaLocation="http://maven.apache.org/POM/4.0.0 https://maven.apache.org/xsd/maven-4.0.0.xsd">
  <modelVersion>4.0.0</modelVersion>

  <groupId>org.toomuch2learn</groupId>
  <artifactId>quarkus-minio-parent</artifactId>
  <version>1.0-SNAPSHOT</version>
  <name>Quarkus MinIO Extension - Parent</name>

  <packaging>pom</packaging>

  <properties>
      ...
      ...
  </properties>

  <modules>      <module>deployment</module>      <module>runtime</module>  </modules>
  <dependencyManagement>
      ...
      ...
  </dependencyManagement>
  <build>
      ...
      ...
  </build>
</project>
Lot of reading is required to understand what and how to implement Quarkus Extension which will support for successful execution of native build. Please go through the references section listed below.
Quarkus Extension for MinIO is implemented based on the principals defined for building an extension. We just register the classes in this extension as what is registered in reflection-config.json. Clone the project and refer to the code on understanding how this is done.
Classes registered in reflection-config.json are registered in QuarkusMinioProcessor.java in deployment module. Below is reference for the same.
@BuildStep
ReflectiveClassBuildItem reflective() {
  return new ReflectiveClassBuildItem(true, true,
    io.minio.messages.LocationConstraint.class.getCanonicalName(),
    io.minio.messages.InitiateMultipartUploadResult.class.getCanonicalName(),
    io.minio.messages.ErrorResponse.class.getCanonicalName(),

    // getting Canonical name does not include $ rather includes . which is failing in native build run
    "io.minio.ErrorCode$ErrorCodeConverter",
    io.minio.messages.CompleteMultipartUpload.class.getCanonicalName(),
    io.minio.messages.Part.class.getCanonicalName(),

    // XML Parser configurations
    "org.simpleframework.xml.core.TextLabel",
    "org.simpleframework.xml.core.ElementLabel",
    "org.simpleframework.xml.core.ElementListLabel");
}- Upon cloning the project, run
mvn clean installto build and install the package to local maven repo. - Add
org.toomuch2learnMinIO Quarkus Extension dependency to the API project next toio.miniodependency.
<!-- MinIO Client SK -->
<dependency>
  <groupId>io.minio</groupId>
  <artifactId>minio</artifactId>
  <version>7.0.2</version>
</dependency>
<dependency>
  <groupId>org.toomuch2learn</groupId>
  <artifactId>quarkus-minio</artifactId>
  <version>1.0-SNAPSHOT</version>
</dependency>- Remove all
io.minioandorg.simpleframeworkclasses registered inreflection-config.json. - Build the native build using
mvn clean package -Pnative. - Run the native build using
./target/catalogue-crud-1.0.0-SNAPSHOT-runnerand test the endpoints with postman. You will observe no more issues related toConstructor not matched for class io.minio.messages.LocationConstraintexceptions.
Conclusion
This article is more on exploring options for implementing File upload to Object Storage Service with Native builds.
With microservice application that we build to handle CRUD operations from other article, this is more of an extension on top of it to introduce additional endpoint to upload image and finally push it to Object Storage Service.
With lot of glitches & challenges, I could finally finish up this example to run successfully with native build. Following step by step provided details from this article, it will be an ease to implement, build and test file upload with Qurakus + RESTeasy and push it to MinIO.

