A Step by Step guide on Implementing & Dockerizing React CRUD RESTful API Integrated Application
Last modified: 04 May, 2020
Introduction
This article focuses on implementing React based frontend application to perform CRUD operations on backend API which exposes these operations as RESTful APIs.
There are lot of online learning materials and blog posts providing greater insights on getting started with implementing React applications and those which focuses on integrating with RESTful APIs. Instead of rewriting the same, we shall focus on few concepts that needs some insights on using React Hooks, Axios Integration, Internationalization and Containerizing.
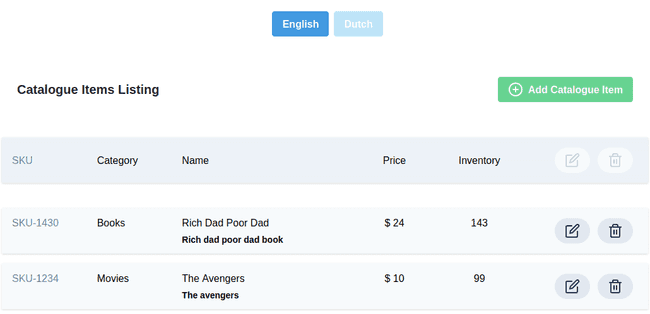
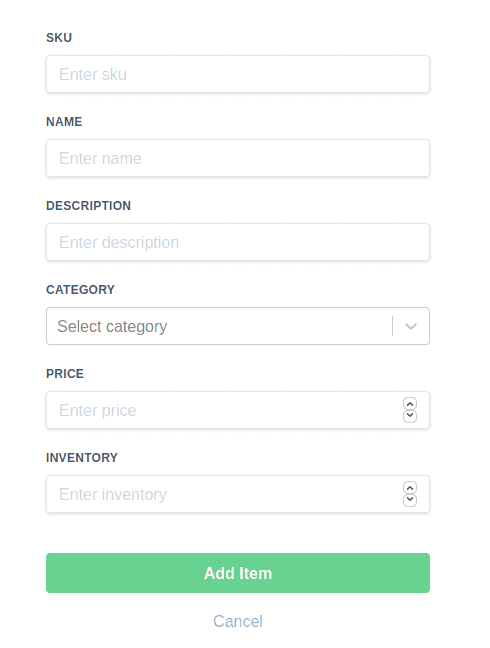
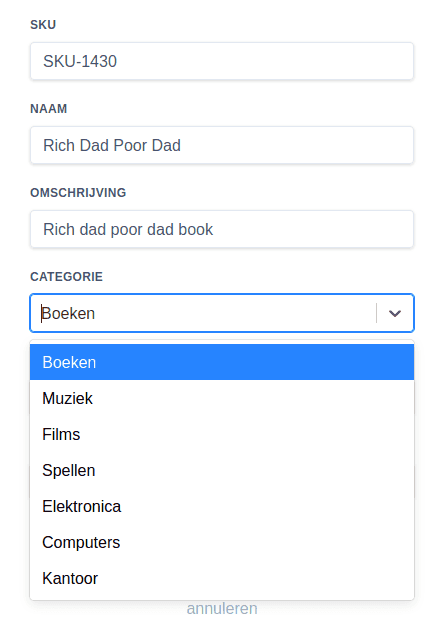
Below are the screenshots of what the application looks like when integrated with the RESTful API service.
Technology stack used in this Article to build and test drive the application
Prerequisites
Basic knowledge of React, Node, Docker is necessary for test driving this application.
Application referred in this article is built and tested on Ubuntu OS. If you are on windows and would like to make your hands dirty with Unix, then I would recommend going through Configure Development environment on Ubuntu 19.10 article which has detailed steps on setting up development environment on Ubuntu.
At the least, you should have below softwares and tools installed to try out the application:
Node&YarnDocker&Docker Compose
$ node -v
v12.16.1

$ yarn -v
1.22.4

$ docker -v
Docker version 19.03.6, build 369ce74a3c
Bootup RESTful API needed for this integration
There is a previous article published on Creating RESTful Microservice using Quarkus which exposes APIs that are compatible to be used with this react application.
Microservice is built using Quarkus to expose APIs and also support handling/publishing events to Kafka. This is integrated with Graylog for centralized logging and Jaeger for distributed tracing.
Below are the Restful APIs that are exposed by Catalogue Management System microservice application.
| HTTP Method | API Name | Path | Response Status Code |
|---|---|---|---|
| POST | Create Catalogue Item | / | 201 (Created) |
| GET | Get Catalogue Items | / | 200 (Ok) |
| GET | Get Catalogue Item | /{sku} | 200 (Ok) |
| PUT | Update Catalogue Item | /{sku} | 200 (Ok) |
| DELETE | Delete Catalogue Item | /{sku} | 204 (No Content) |
Follow the series of steps mentioned in Prerequisites section to boot up the database and supporting containers. To ensure microservice is up and running, access http://localhost:8080/health in browser and should show status as UP.
Exploring the React Application
Project is bootstrapped with create-react-app and configured with additional dependencies.
This should clone the application with below project structure and dependencies added to package.json
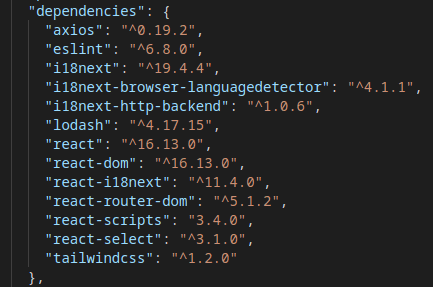
As observed, below are the dependencies added to the project which are the building blocks of this application.
react-select- A flexible and beautiful Select Input control.react-i18next- A powerful internationalization framework for React / React Native which is based oni18next.tailwindcss- A Utility-first CSS Framework.Axios- Promise based HTTP client for the browser and node.js.lodash- A modern JavaScript utility library delivering modularity, performance & extras.
Drilling through the code will give us an understanding on the implementation if you are aware of implementing simple React applications.
Of the whole, we shall focus on below aspects rather than the core concepts of React.
React Hooks
Hooks are a new addition in React 16.8. Hooks provide a more direct API to the React concepts you already know: props, state, context, refs, and life cycle. As we will show later, Hooks also offer a new powerful way to combine them.
Refer to the documentation for detailed understanding on React Hooks.
Below are some highlights:
- Hooks allow you to reuse stateful logic without changing your component hierarchy.
- Hooks let you split one component into smaller functions based on what pieces are related.
- Hooks let you use more of React’s features without classes.
- Hooks work side-by-side with existing code so you can adopt them gradually.
★ useState hook allows us to use state in our functional components. A useState hook takes the initial value of our state as the only argument, and it returns an array of two elements. The first element is our state variable and the second element is a function in which we can use the update the value of the state variable.
const [form, setState] = useState({  sku: '',
  name: '',
  description: '',
  category: '',
  price: '',
  inventory: ''
});

const updateField = e => {
  setState({    ...form,
    [e.target.name]: e.target.value
  });
};

const updateCategoryChange = selectedOption => {
  setState({     ...form,
    category: selectedOption
  });
};
★ useEffect adds the ability to perform side effects from a function component. It serves the same purpose as componentDidMount, componentDidUpdate, and componentWillUnmount in React classes, but unified into a single API. By default, React runs the effects after every render — including the first render.
const [selectedCatalogueItem, setSeletedCatalogueItem]   = useState({
    sku: '',
    name: '',
    description: '',
    category: '',
    price: '',
    inventory: ''
  });

useEffect(() => {  const catalogueItemSku = sku;

  getCatalogueItem(sku);
  const selectedCatalogueItem = catalogueItems.find(catalogueItem => catalogueItem.sku === catalogueItemSku);

  setSeletedCatalogueItem(selectedCatalogueItem);
}, []);
★ createContext hook allows us to consume the value of a context. It is introduced part of the Context API. Context provides a way to pass data through the component tree without having to pass props down manually at every level.
export const GlobalContext = createContext();

return (<GlobalContext.Provider value={{
  catalogueItems: state.catalogueItems,
  notification: state.notification,
  removecatalogueItem,
  addcatalogueItem,
  editcatalogueItem,
  getCatalogueItems,
  getCatalogueItem
}}>
    {children}
</GlobalContext.Provider>);
★ useContext hook lets you subscribe to React context without introducing nesting.
const { catalogueItems, getCatalogueItem, editcatalogueItem } = useContext(GlobalContext);
const onSubmit = e => {
  e.preventDefault();

  editcatalogueItem(selectedCatalogueItem);
  history.push('/');
}
★ useReducer hook lets you manage local state of complex components with a reducer. It allows functional components in React access to reducer functions from your state management. It accepts reducer of type (state, action) => newState, and returns the current state paired with a dispatch method.
export default (state, action) => {
  if(action.type === 'API_CALL_FAILED') {      console.log(action.payload,action.error);
      return {
          ...state,
          notification: prepareNotificationToDisplay("failure", action.payload)
      };
  }
  else if(action.type === 'GET_CATALOGUE_ITEMS') {
      //console.log("===> GET_catalogueItemS_ITEMS received", action.payload);      return {
          ...state,
          catalogueItems: action.payload
      };
  }
}const [state, dispatch] = useReducer(AppReducer, initialState);
function dispatchAPICallFailure(message, e) {
dispatch({ type: 'API_CALL_FAILED',
error: e,
payload: message
});
}Internationalization support
Support for internationalization is achieved with react-i18next. With simple steps, we can localize the application.
Ensure you have the below dependencies in package.json
"dependencies": {
  ...
  ...
  "i18next": "^19.4.4",
  "i18next-browser-languagedetector": "^4.1.1",
  "i18next-http-backend": "^1.0.6",
  "react-i18next": "^11.4.0",
  ...
  ...
}
Configure i18n
Start with configuring i18n by creating i18n.js at the root of src folder as below. This will register Backend making HTTP calls to load translation files from default path /locales/{{lng}}/{{ns}}.json along with LanguageDetector which detects user language in the browser by many different means.
Observing the init block, The fallback language is set to en and debug to true which will log console messages which will help us to track any missing translation messages in language files.
import i18n from 'i18next';
import Backend from 'i18next-http-backend';
import LanguageDetector from 'i18next-browser-languagedetector';
import { initReactI18next } from 'react-i18next';

i18n
  // load translation using http -> see /public/locales
  // learn more: https://github.com/i18next/i18next-http-backend
  .use(Backend)
  // detect user language
  // learn more: https://github.com/i18next/i18next-browser-languageDetector
  .use(LanguageDetector)
  // pass the i18n instance to react-i18next.
  .use(initReactI18next)
  // init i18next
  // for all options read: https://www.i18next.com/overview/configuration-options
  .init({
    fallbackLng: 'en',    debug: true,

    interpolation: {
      escapeValue: false, // not needed for react as it escapes by default
    },
  });

export default i18n;
To bundle this to the application, Import i18n.js in index.js
import React from 'react';
import ReactDOM from 'react-dom';
import { BrowserRouter } from 'react-router-dom';
import './stylesheet/styles.css';
import App from './App';

// import i18n (needs to be bundled ;))
import './i18n';
ReactDOM.render(
    <BrowserRouter>
        <App />
    </BrowserRouter>,
    document.getElementById('root')
)
Translate the application
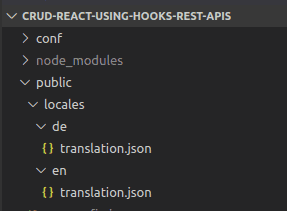
As mentioned earlier, translation messages are loaded from Backend with default path for loading the translation language files from /locales/{{lng}}/{{ns}}.json. To get this working, create locales file under public folder and start creating folders for languages that are being supported with translation json files.
Below is sample for translation.json from en and de language folders:
{
  "title": "Catalogue Items Listing",
  "controls": {
      "add": "Add Catalogue Item",
      "addItem": "Add Item",
      "editItem": "Edit Item",

      "cancel": "Cancel"
  },
  "nodata": "No Data",
  "form": {
      "sku": "SKU",
      "name": "Name",
      "description": "Description",
      "category": "Category",
      "price": "Price",
      "inventory": "Inventory"
  },
  ...
  ...
}{
"title": "Catalogusitems",
"controls": {
"add": "Catalogusitem toevoegen",
"addItem": "Voeg item toe",
"editItem": "Item bewerken",
"cancel": "annuleren"
},
"nodata": "Geen informatie",
"form": {
"sku": "SKU",
"name": "Naam",
"description": "Omschrijving",
"category": "Categorie",
"price": "Prijs",
"inventory": "Voorraad"
},
...
...
}Changing language
Language can be changed by detecting for the change with i18next-browser-languageDetector or can be changed with user action.
Navigate to Heading.js and observe how UI controls are added to switch language.
...
...
export const Heading = () => {

  const { t, i18n } = useTranslation();  const { notification } = useContext(GlobalContext);
  const [notificationToDisplay, setNotificationToDisplay]
      = useState({
          display: false,
          message: ''
      });

  const [language, setLanguage] = useState('en');
  const changeLanguage = lng => {      i18n.changeLanguage(lng);

      setLanguage(lng);
  };

  useEffect(() => {
      setLanguage(i18n.language);
      setNotificationToDisplay(notification);
  }, [notification, i18n.language]);

  return (
      <Fragment>
      <div className="mt-5">
          <button className={(language === 'en' ? 'bg-blue-500' : 'bg-blue-200') + ` hover:bg-blue-700 text-white font-bold py-2 px-4 rounded m-2`}              onClick={() => changeLanguage('en')}>English</button>
          <button className={(language === 'de' ? 'bg-blue-500' : 'bg-blue-200') + ` hover:bg-blue-700 text-white font-bold py-2 px-4 rounded`}              onClick={() => changeLanguage('de')}>Dutch</button>
      </div>
...
...
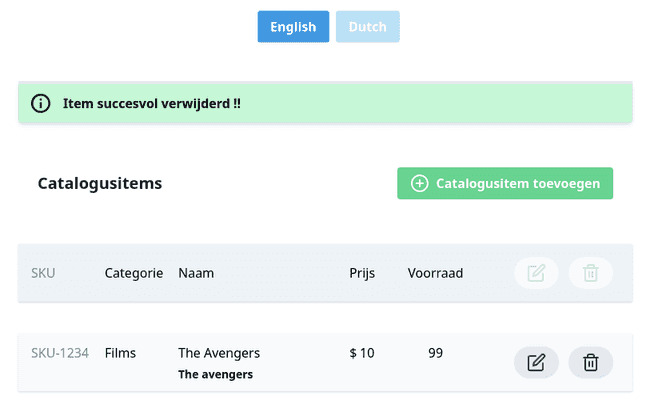
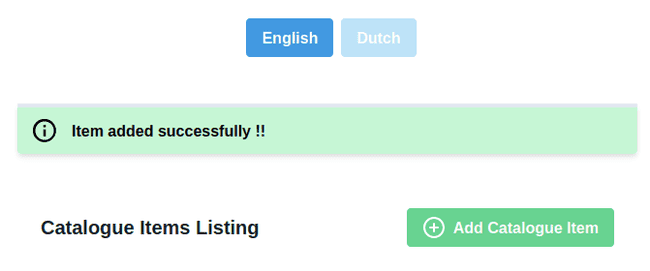
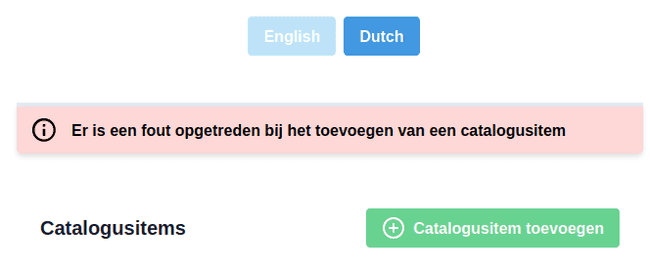
As highlighted, language state is defined and is being set in useEffect which will be invoked upon rendering the component and also upon onClick action. Based on language value, background of the button is changed resulting in below output when passing language as query param http://localhost:3000/?lng=de or click on language button.

API Integration
Axios is the http client used to integrate with backend API. Axios is promise-based library which uses async and await for implementing asynchronous code.
Axios allows us to define a base instance with which we can define a URL and any other configuration elements. http-common.js exports a new axios instance with these configuration details.
import axios from "axios";

export default axios.create({
  baseURL: "http://localhost:8080/api/v1",  headers: {
    "Content-type": "application/json"  }
});
API integrations to catalogue management backend service are defined in CatalogueService.js and called upon from context provider functions in GlobalState.js. Below is the sample for getting catalogue items and adding catalogue item.
const getCatalogueItems = async () => {
    await catalogueService
    .getAll()    .then(response => {
        //console.log("======> getCatalogueItems response :: ",response.data);
        dispatch({
            type: 'GET_CATALOGUE_ITEMS',            payload: response.data.data
        });
    })
    .catch(e => {
        dispatchAPICallFailure('notifications.failure.itemGetAll', e);    });
};

const addcatalogueItem = async (catalogueItem) => {
    state.notification.display = false;

    await catalogueService    .create(catalogueItem)
    .then(response => {
        //console.log("======> addcatalogueItem response :: ",response);
        dispatch({
            type: 'ADD_catalogueItem',            payload: catalogueItem
        });
    })
    .catch(e => {
        dispatchAPICallFailure('notifications.failure.itemAdded', e);    });
};
Based on the response status, dispatch event is published which will be handled in AppReducer.js to display appropriate notification message.
export default (state, action) => {

  function prepareNotificationToDisplay(status, message) {      return {
          display: true,
          status: status,
          message: message
      }
  }

  if(action.type === 'API_CALL_FAILED') {      console.log(action.payload,action.error);
      return {
          ...state,
          notification: prepareNotificationToDisplay("failure", action.payload)      };
  }
  else if(action.type === 'ADD_catalogueItem') {      //console.log("===> ADD_catalogueItem ::", state, action);
      return {
          ...state,
          catalogueItems: [...state.catalogueItems, action.payload],
          notification: prepareNotificationToDisplay("success", 'notifications.success.itemAdded')      };
  }
  ...
  ...
  ...
}
Starting & Building the application
Ensure to install node dependencies before starting the application.
$ yarn installBelow are the scripts configured in package.json which enables us to start the application in dev mode, build and test the app.
"scripts": {
	"dev": "react-scripts start --no-cache",
	"build": "react-scripts build'",
	"test": "react-scripts test --no-cache",
  "eject": "react-scripts eject",
  "serve": "serve -s build"
}
Start application in dev mode. Upon successfully starting, browser should be opened with url pointing to http://localhost:3000
$ yarn devRun the below command to create optimized production build, which can be deployed or served using serve package and accessible at http://localhost:5000.
$ yarn build

$ yarn serve
Dockerizing React Application with Runtime environment variables
In the world of containers, applications are packed as cloud native apps and deployed to platforms which ensure apps to run efficiently and scale easily.
With different environments and their hostname changing for each deployment, it is possible to configure backend applications with service discovery services or injected during runtime when deployed to container orchestration platforms. But this is not possible for frontend applications as we cannot define environment variables inside the browser environment.
To ensure frontend apps are connected to scaling backend services, we need to inject environment variables when we start the container. Then we can read environment variables from inside the container and do appropriate actions such that the frontend app can access the backend service from browser.
Steps on configuring in the application, using it in the code and passing the Runtime Environment Variable to docker container are explained in detail in this article.
Below are brief changes done as per steps defined in the article.
- Create
.envfile to the root of the project with below environment variable
API_URL=http://localhost:8080/api/v1- Create
env.shwith content below. This will read the environment variable if exists or use default one in.envand createenv-config.jsfile which will be generated when application is started usingyarn devor when docker container is ran for the first time.
#!/bin/bash

# Recreate config file
rm -rf ./env-config.js
touch ./env-config.js
# Add assignment
echo "window._env_ = {" >> ./env-config.js
# Read each line in .env file
# Each line represents key=value pairs
while read -r line || [[ -n "$line" ]];
do
  # Split env variables by character `=`  if printf '%s\n' "$line" | grep -q -e '='; then
    varname=$(printf '%s\n' "$line" | sed -e 's/=.*//')
    varvalue=$(printf '%s\n' "$line" | sed -e 's/^[^=]*=//')
  fi

  # Read value of current variable if exists as Environment variable  value=$(printf '%s\n' "${!varname}")
  # Otherwise use value from .env file
  [[ -z $value ]] && value=${varvalue}

  # Append configuration property to JS file
  echo "  $varname: \"$value\"," >> ./env-config.jsdone < .env

echo "}" >> ./env-config.js- Include
env-config.jsinpublic/index.jsto load the environment variable
<html>
  <head>
    ...
    ...
    <title>2much2learn-shopping-app</title>
    <script src="%PUBLIC_URL%/env-config.js"></script>
  </head>
  ...
  ...
</html>- Use the environment variable in
http-common.js
import axios from "axios";

export default axios.create({
  baseURL: window._env_.API_URL,  headers: {
    "Content-type": "application/json"
  }
});- Create
Dockerfilewith content below. As highlighted, this isdocker multistagebuild which first builds the application and then copy the output from application build tonginxcontainer along with nginx config files available inconffolder.
# => Build container
FROM node:alpine as builder
WORKDIR /app
COPY package.json .
COPY yarn.lock .
RUN yarn
COPY . .
RUN yarn build
# => Run container
FROM nginx:1.17.10-alpine
# Nginx config
RUN rm -rf /etc/nginx/conf.d
COPY conf /etc/nginx
# Static build
COPY /app/build /usr/share/nginx/html/
# Default port exposure
EXPOSE 80
# Initialize environment variables into filesystem
WORKDIR /usr/share/nginx/html
COPY ./env.sh .COPY .env .
# Add bash
RUN apk add --no-cache bash
# Run script which initializes env vars to fs
RUN chmod +x env.sh# RUN ./env.sh
# Start Nginx server
CMD ["/bin/bash", "-c", "/usr/share/nginx/html/env.sh && nginx -g \"daemon off;\""]- Now, it’s time to create and test drive the docker image. Follow below commands to create the build and run it.
API_URLenvironment variable is passed when running the docker image which will be used when accessing backend service.
$ docker build . -t narramadan/crud-react-2much2learn-shopping-app

$ docker run -p 3000:80 -e API_URL=https://catalogue-crud.api.com -t narramadan/crud-react-2much2learn-shopping-app

$ docker push -t narramadan/crud-react-2much2learn-shopping-app- To support this during development, minor changes needs to be done to
package.jsonto runenv.shand createenv-config.jsindevmode.
"scripts": {
  "dev": "chmod +x ./env.sh && ./env.sh && cp env-config.js ./public/ && react-scripts start --no-cache",  "build": "sh -ac '. ./.env; react-scripts build'",  "test": "react-scripts test --no-cache",
  "eject": "react-scripts eject",
  "serve": "serve -s build"
}
Conclusion
As Fullstack Developer, its ideal to get your hands dirty with both backend and frontend development and implementing CRUD application is the easy way to gain hands on knowledge on the technology stack. This is just tip of an iceberg with getting things done with React.
With capabilities added to use Runtime Environment Variables to pass backend host details, frontend application can be configured to connect to backend service running in any environment without change in code or docker image.
